Projects
Add and manage the projects your orders are built against.
Last updated 24 days ago
Adding Projects to the Rules Engine
Introduction
Setting up your projects efficiently in the rules engine is fundamental for optimized operations. This guide walks you through the steps to manage shops and projects swiftly.
Step-by-Step Guide
Adding a Project
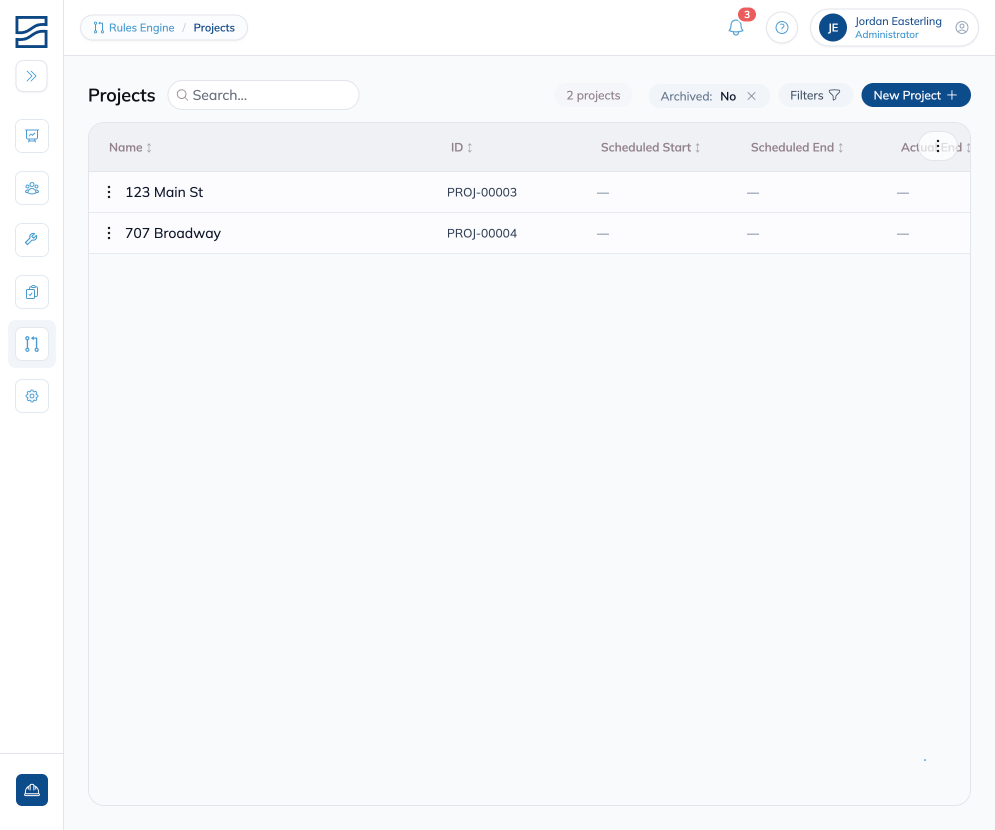
- Navigate to the "Projects" tab.
- Click the "New Project" button on the top right.
- Provide a name for the project (e.g., "Sample Project") and click "Save."
Creating Projects from Planning
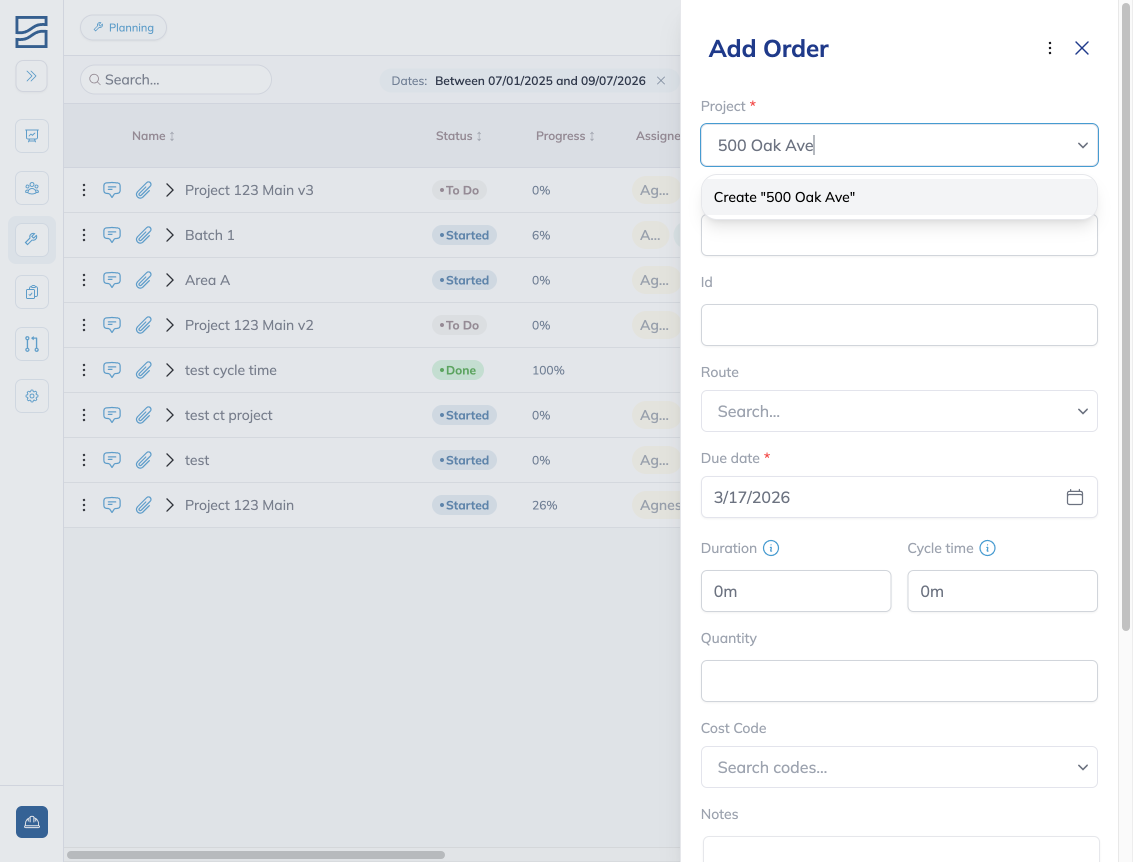
Projects can also be automatically created from the Planning module. When creating a new order,
- Type a new project name in the Project field
- Select "Create" to add it
The project will automatically appear in the Rules Engine Projects list.
Editing and Managing Projects
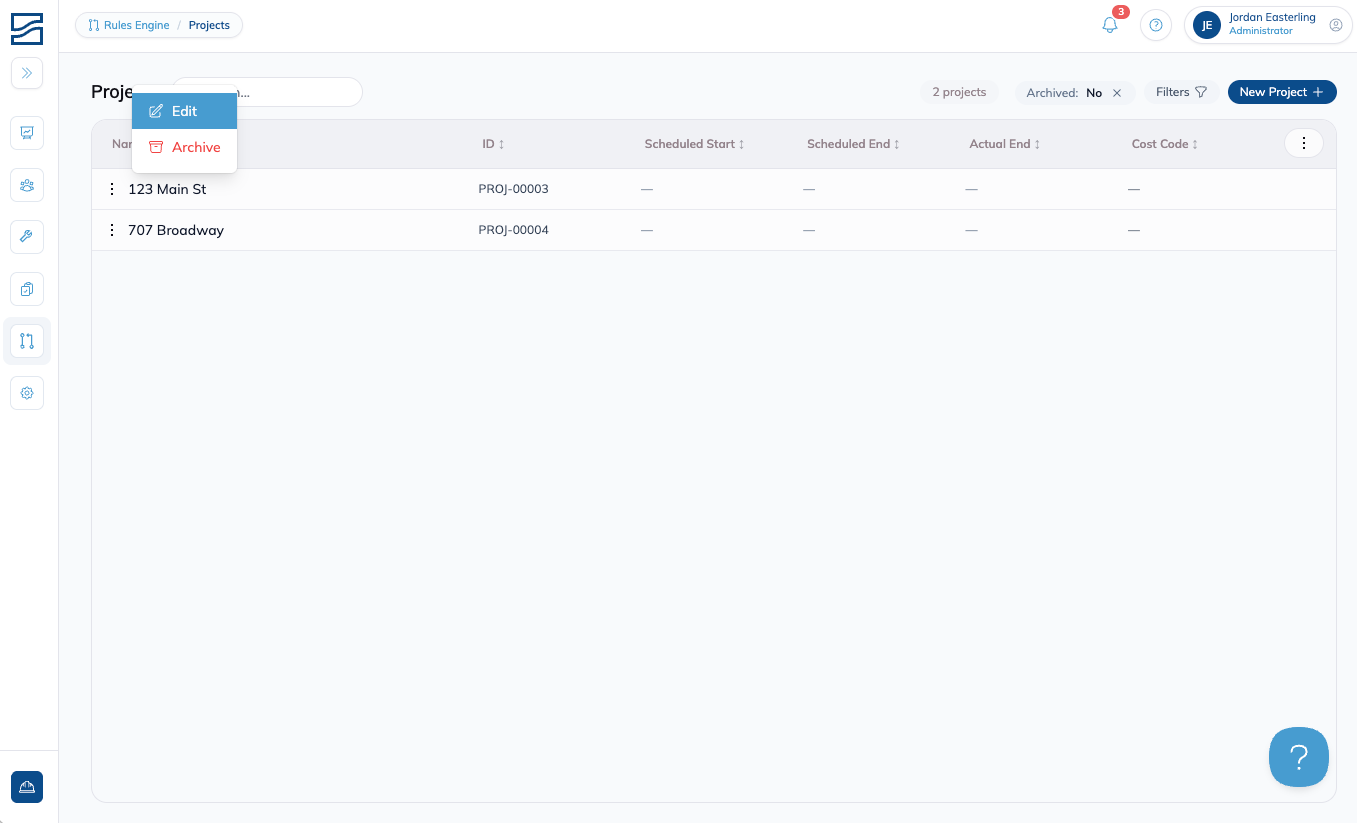
- Locate your project in the list.
- Click on the three dots next to the project name on the right-hand side.
- Choose "Edit" to modify the project's details, such as start and end dates.
Archiving Projects
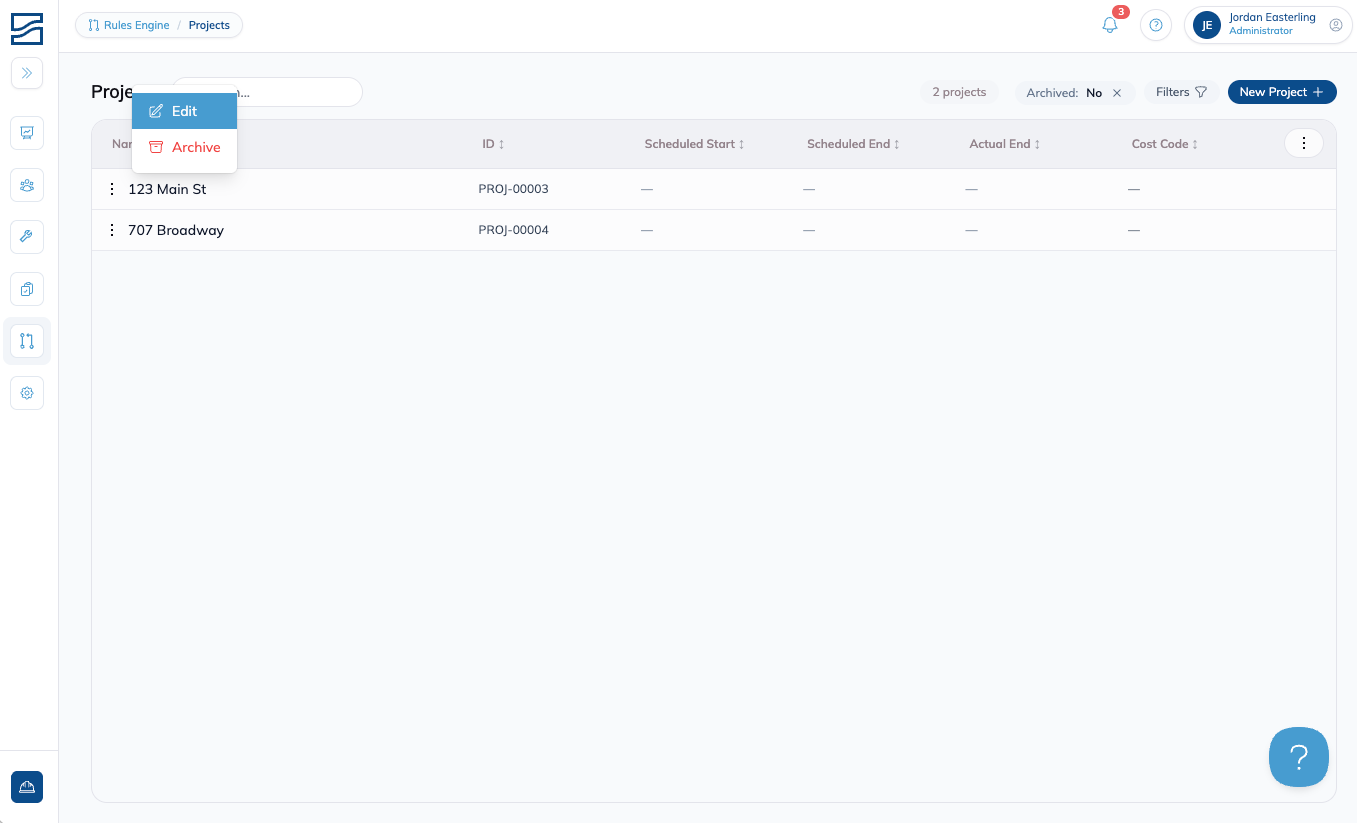
- Use the same three-dot menu to archive the project.
- Click archive.
- Note: archived projects can be revisited later, as covered in subsequent guides.
Tips
- Review your project list often. Add to it and update it so it matches the work you actually have on.
Conclusion
With these simple steps, you can effectively configure your shop's operational parameters and projects in Building Swell's rules engine. The clearer and more accurate your data, the smoother your shop's operations.
Still need help? Ask the team