Departments
Organize your teams into departments, and set their hours, shifts, holidays, and availability.
Last updated 19 days ago
Managing Departments in your company
Introduction
Departments let you organize your teams by location or function, whether that's a prefab shop floor, procurement team, or design group. From the Departments screen, you can manage operating hours and breaks, assign shifts, close a department for a holiday or put it on shortened hours, record one person's time off or extra hours, and configure department-specific automation and tracking settings.
Step-by-Step Instructions
Navigating to Departments
From the left-hand menu, click Rules Engine.
Select Departments.
You'll see a list of your departments on the left and the selected department's settings on the right. A breadcrumb at the top of the page shows Rules Engine / Departments for easy navigation.
Adding a Department
In the Departments list, click + Add new.
Select the time zone for that department.
Click Save.
Once saved, you'll see tabs for Hours, Shifts, Holidays, Availability, and Settings.
Hours, Shifts and Settings belong to the department you have selected on the left. Holidays and Availability span every department, so what you see on them does not change when you pick a different one.
Setting Department Hours
Department hours control when the department is typically operating and available for work.
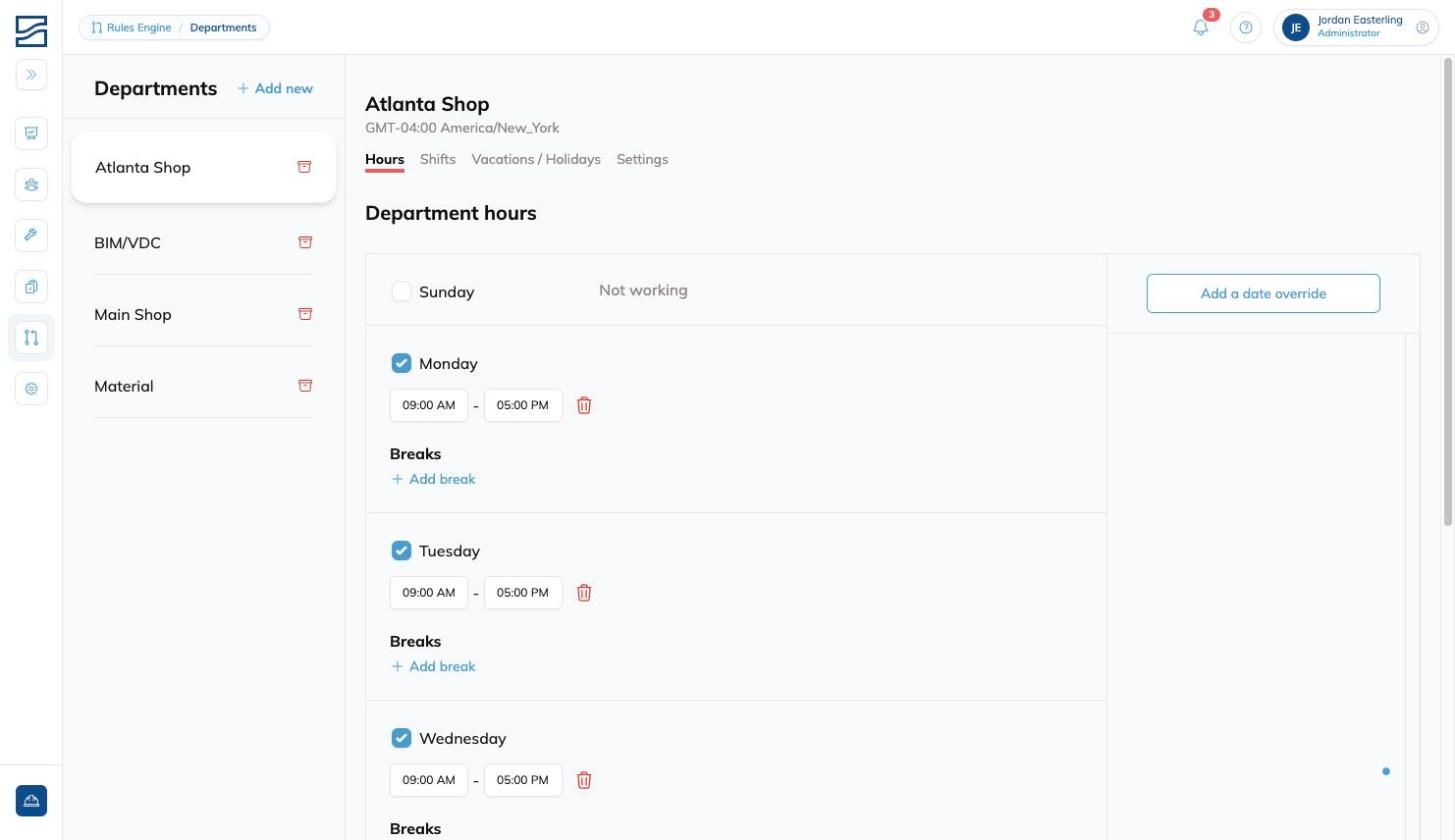
Click the Hours tab.
Toggle on each working day by checking the checkbox next to the day name. Non-working days display as "Not working."
For each enabled day, set a start and end time (e.g., 09:00 AM – 05:00 PM). Use the trash icon to remove a time block.
To add a break within a day, click + Add break under the Breaks section for that day. Set the break duration and start time.
For a one-off change to a single day, leave the regular hours alone and use the Holidays tab for the whole department, or the Availability tab for one person.
Changes save automatically as you make them.
Managing Shifts
Shifts let you define specific working schedules for your team members, including daily hours, breaks, and staffing.
Changing a shift recalculates route times
A department's default shift drives the Duration of every Department Route on it. Change the default shift, or edit the hours of the shift it's already on, and Building Swell recalculates Duration across those routes. You'll be asked to confirm first, and on a large set of routes it takes a little time to work through.
Orders are never touched. Work already planned or in flight keeps its times. See Cycle Time, Duration, and Float.
A brand-new department automatically creates a shift and sets it as the default, so its routes have a shift to follow from the start.
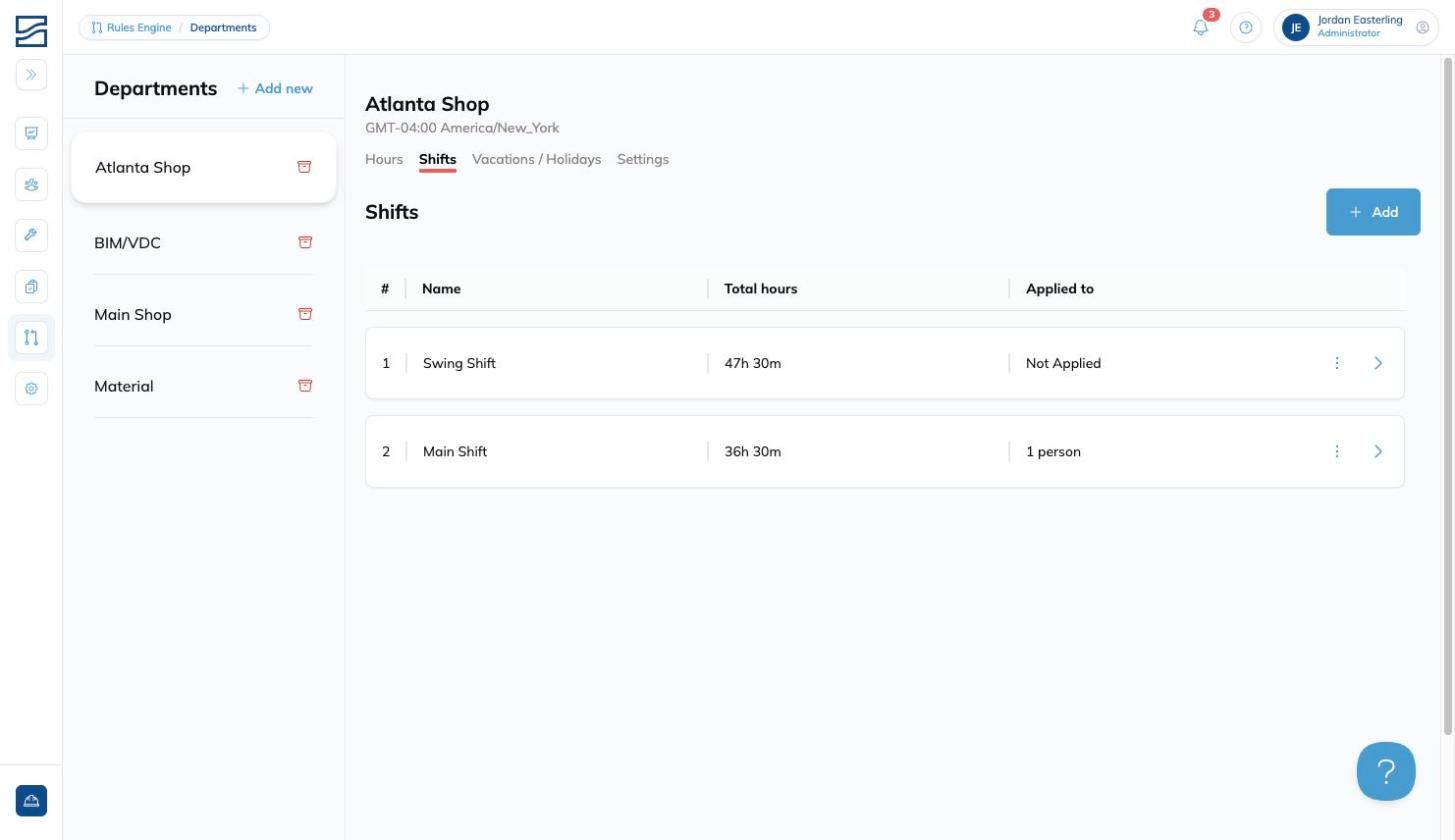
Click the Shifts tab. You'll see a table listing all shifts with columns for Name, Total hours, and Applied to (the number of people assigned).
Click + Add to create a new shift, or click the arrow (>) on an existing shift row to edit it.
On the shift detail page, enter a Shift name.
Under the Hours per day sub-tab, configure each day's schedule:
Toggle days on or off using the checkboxes.
Set start and end times for each working day.
Add breaks by clicking + Add break and entering a Duration and Starting at time.
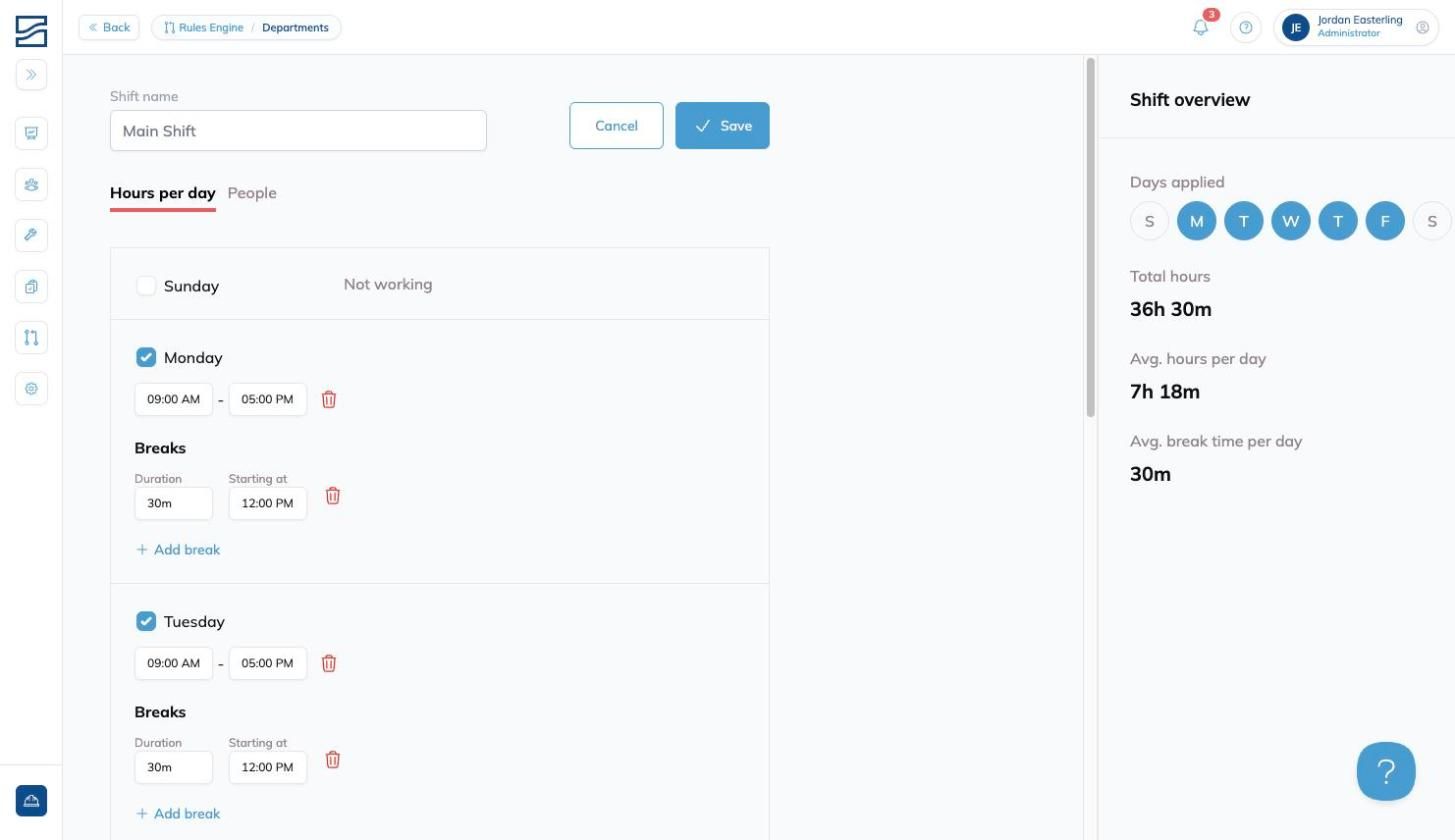
Review the Shift overview panel on the right, which displays Days applied, Total hours, Avg. hours per day, and Avg. break time per day.
To assign people to the shift, click the People sub-tab and then click + Apply to to add team members.
Click Save when done, or Cancel to discard changes.
Use the three-dot menu (⋮) on a shift row for additional options.
Adding Holidays and Shortened Days
A holiday covers a whole department and everyone in it. It either closes the department for the days in the range, or replaces those days with shorter hours.
Click the Holidays tab. You'll see every department's holidays under Upcoming and Past, with columns for Department, Name, Dates and Hours.
Click Add holiday.
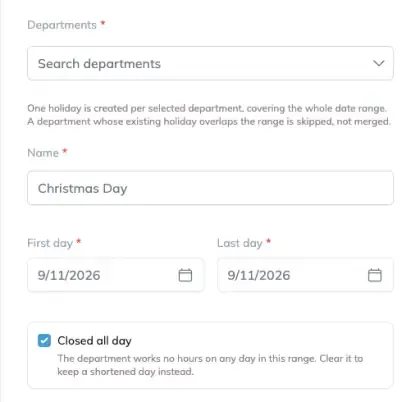
Pick the Departments it applies to. One holiday is created per department you select, covering the whole date range.
Enter a Name, for example Christmas Day.
Set the First day and Last day. A shutdown week is one holiday, not seven.
Leave Closed all day ticked to close the department for every day in the range. Clear it and give a Start time and an End time to keep a shortened day instead.
Click Create.
Shortened hours replace the day, they do not trim it
The times you enter become the department's hours for each day in the range, so a longer span lengthens the day just as a shorter one shortens it. An end time before the start time is an overnight day.
Those hours land only on days the department already works. For a mandated Saturday, tick Include days the department does not normally work. Leave it clear and a range that happens to span a weekend leaves that weekend alone.
A department whose existing holiday already overlaps the range is skipped rather than merged, and the result names the holiday it ran into.
A holiday covers the whole department. To change one person's hours, whether they are away or working longer, use the Availability tab beside this one. A person's own record wins over their department's, so somebody given hours on a day the department is closed is on the schedule for those hours. See Availability.
Department Settings
The Settings tab includes configuration options organized into several sections. Click the Settings tab to access them.
All settings changes apply only to the selected department.
Archiving a Department
In the department list on the left, click the archive icon (box icon) next to the department name.
Confirm the archive action.
Archived departments are no longer active but can be restored later if needed.
Tips and Best Practices
Use clear naming conventions for departments so your team understands which is which at a glance.
Flag only physical production spaces as shop locations. This ensures accurate tracking of hours, labor, and assignments.
Assign workers to shifts that match real-world schedules. This improves reporting accuracy and daily planning.
Leave the regular department hours alone for a one-off change. Use a Holidays entry when it is the whole department's day and an Availability record when it is one person's.
Set up breaks within shifts to keep time tracking accurate and reflect real working patterns.
Configure the Dead Time Threshold to match your workflow so inactivity is classified correctly.
Turn Round hours to the shift on for the departments that bill against shift hours, and leave it off for the rest. It changes the hours shown on dashboards, order details and Timesheets.
Have additional questions? Contact Us
Video walkthrough
Setting Up Departments
Still need help? Ask the team