Roles
Control what each person can see and do, using Admin or a custom role built from read, create, update, and delete permissions.
Last updated 20 days ago
Introduction
In Building Swell, every user belongs to an organization and is assigned a role. Roles control what users can see and do across the product. This guide explains role types, how permissions work, how to manage roles, and common permission setups by team type.
Step-by-Step Guide
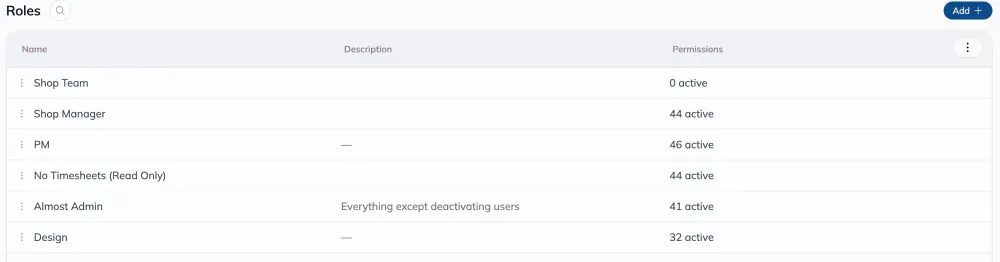
Navigating to Roles
Go to the Settings tab.
Click on the Roles tab.
Creating a New Role
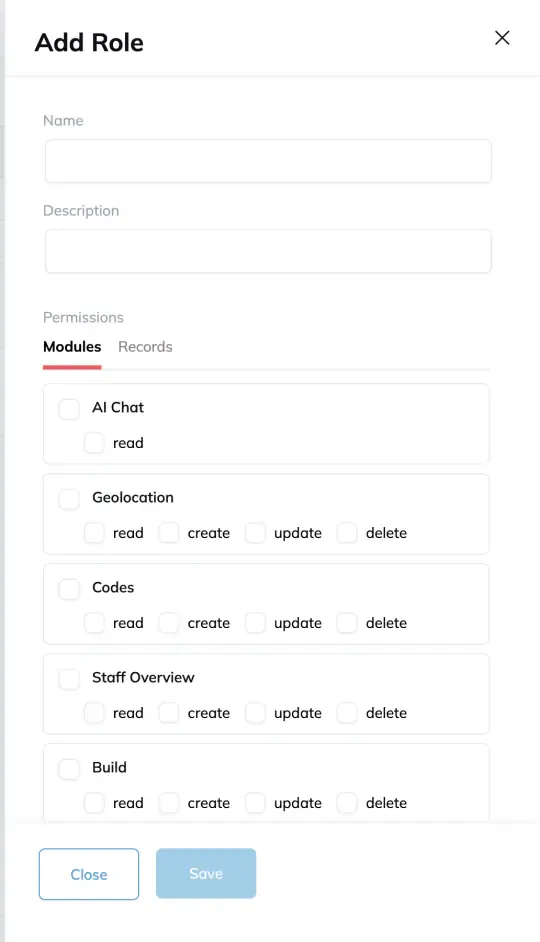
Click the 'Add' button at the top right corner of the screen.
Enter a 'Name' and 'Description' for the new role.
Adjust permissions as required. For instance, you can provide read-only access for a particular module or allow full access.
Save your settings.
Editing an Existing Role
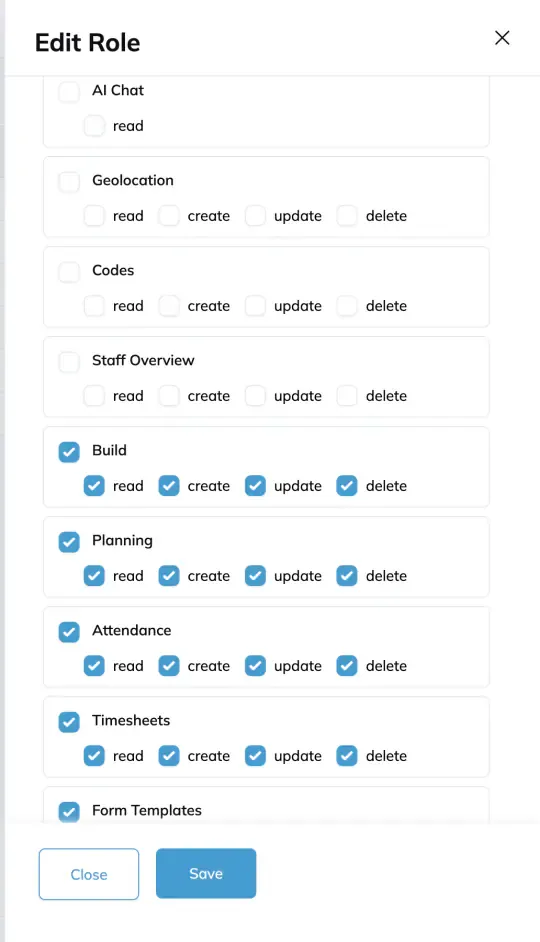
Find the role you wish to edit and click the 'Edit' button.
Modify permissions as needed.
Click 'Save'.
Deleting a Role
Locate the role you wish to delete.
Click the archive bin icon.
Confirm the deletion.
How Permissions Work
Every user is assigned a role: either Admin or a Custom Role.
Admin: Full access to everything in the organization. No permission restrictions apply.
Custom Role: Access is defined by a specific set of permissions granted to that role.
Permissions come in four types:
Read: View-only access to a module or feature.
Create: Ability to add new records or entries.
Update: Ability to modify existing records or entries.
Delete: Ability to remove records or entries.
When editing a custom role, you'll see checkboxes next to each permission for Read, Create, Update, and Delete. Simply check or uncheck the boxes to control what users on that role can do.
Important: Removing Read access from a module will hide that entire section of the product for users on that role. They won't see an error: the page or feature simply won't appear.
Permission Reference
The table below lists every permission module in Building Swell. For each module, the description explains what users can see and do when that permission is enabled.
Recommended Role Setups
The following are suggested starting points for common role types. Adjust as needed for your organization.
A ✅ means the box should be checked; a ➖ means leave it unchecked.
Shop Floor Team
QC Inspector
Team Lead / Supervisor
Production Manager
Planner / Scheduler
IT / Operations Admin
Granular Permissions
The above permissions are a good starting point, but sometimes teams need to go even more granular. Maybe only the PM should edit the order due date. Maybe a Designer should edit the Design phase and only read everything else. Granular permissions let you scope a role down to specific properties or specific phases, so each team stays focused on the work they own.
Locking due dates
To make a due date editable by only one role (e.g., the order due date only by the PM), restrict every other role from editing it.
For roles that need to modify the due date:
Go to Settings → Roles.
Click on the ellipsis in the role and select “Edit.”
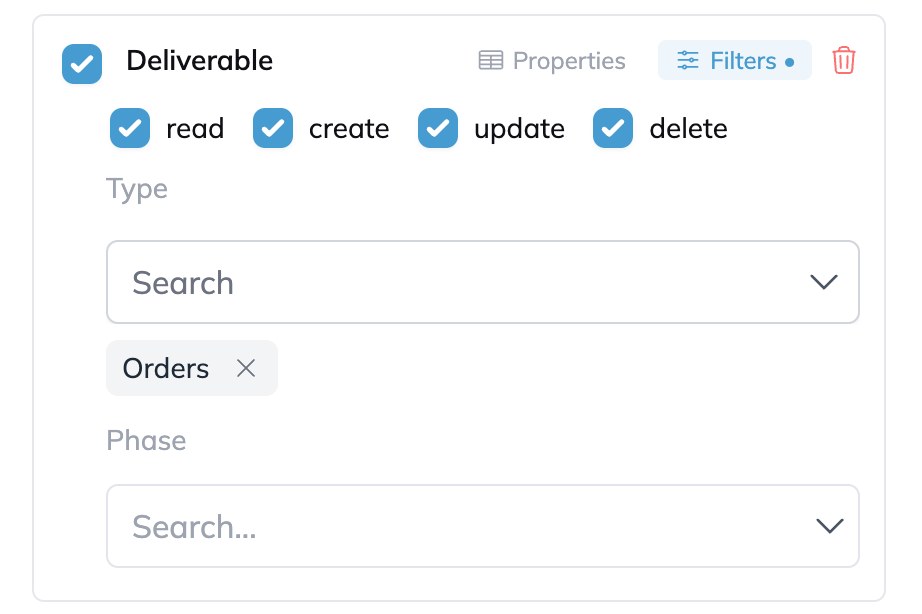
Make sure that the Deliverable: Orders card looks like this, with any extra property permissions enabled.
Preventing other roles from editing the due date:
Go to Settings → Roles.
Click on the ellipsis in the role and select “Edit.”
Go to the Records tab and scroll down until you find the “Deliverable: Orders” card.
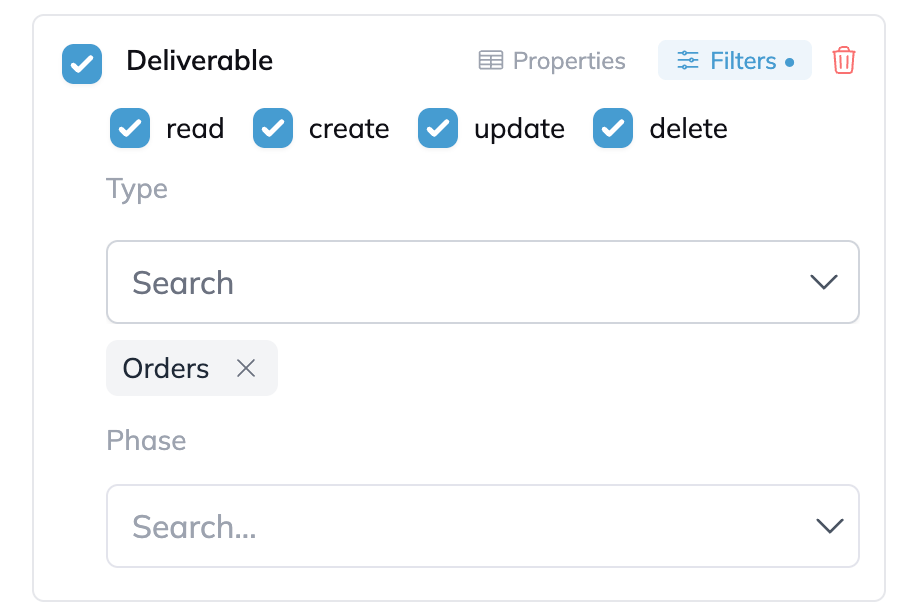
Click Properties, and click on “+ Add property.”
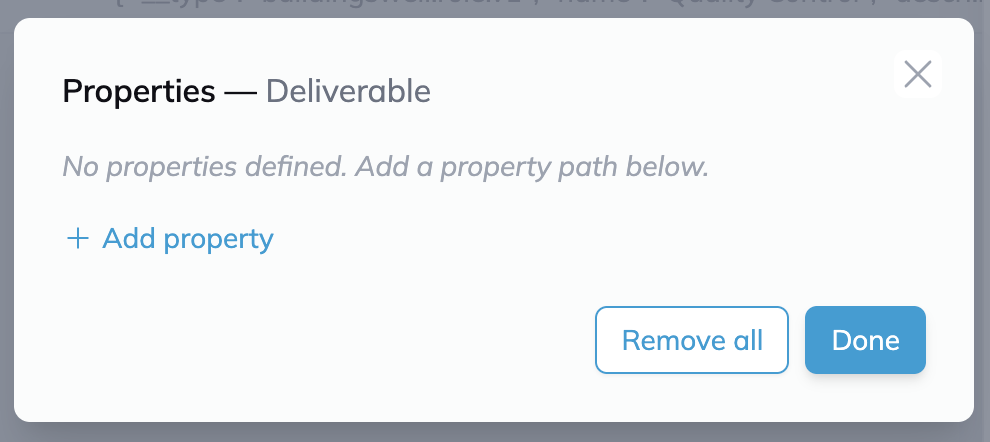
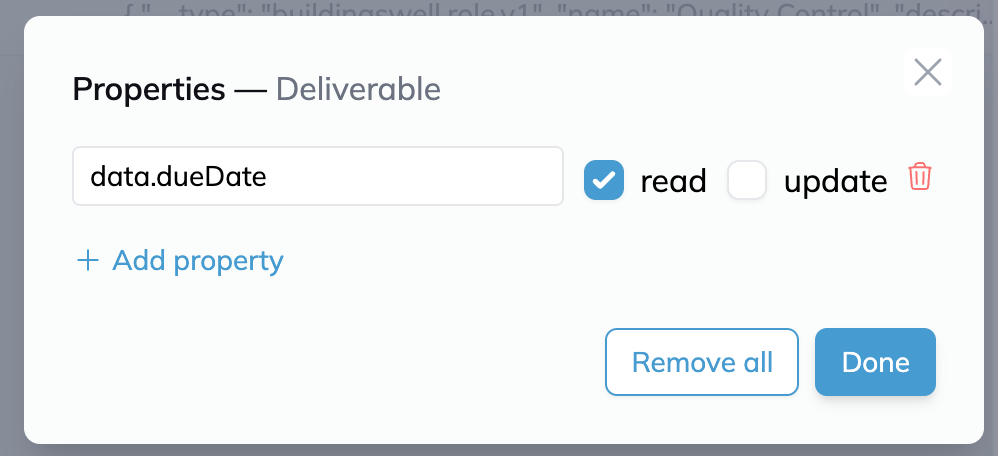
Type data.dueDate, check the Read box, and click Done.
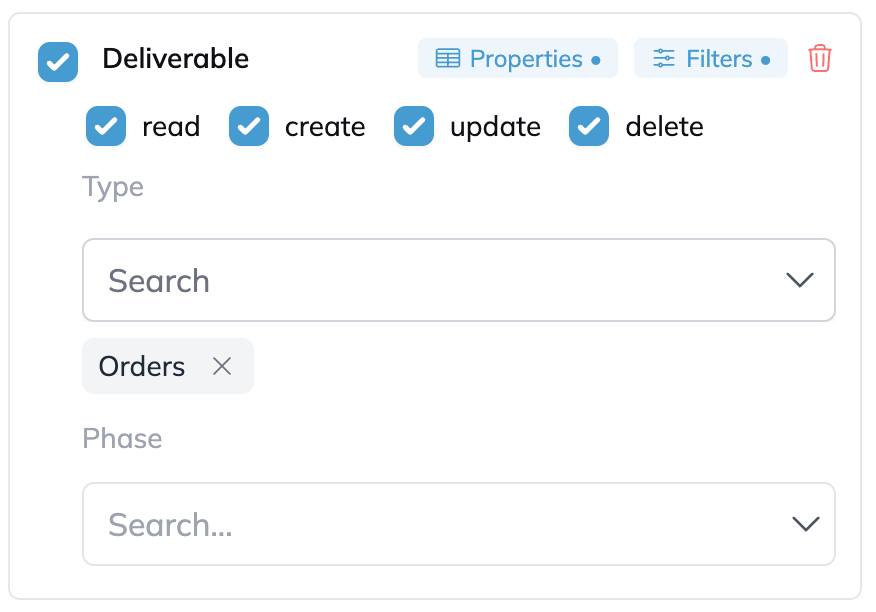
The card will show the Properties with a dot to indicate that you have a property permission active.
Locking other phases
To scope a role so it can edit only its own phase and read all others, for example a Designer who can edit Design but only read Programming and Production:
For locking other phases:
Go to Settings → Roles.
Click on the ellipsis in the role and select “Edit.”
Go to the Records tab and scroll down to the bottom of the list. There will be a “+ Add section” button.
Click it, and then select the “Deliverable” option.
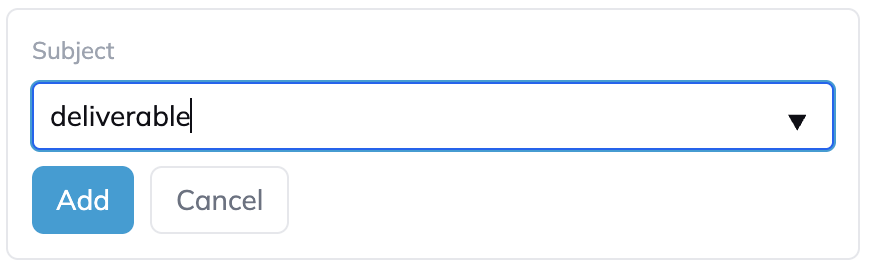
You will get a card like this.

Select Type: Phases and then only enable “Read”.
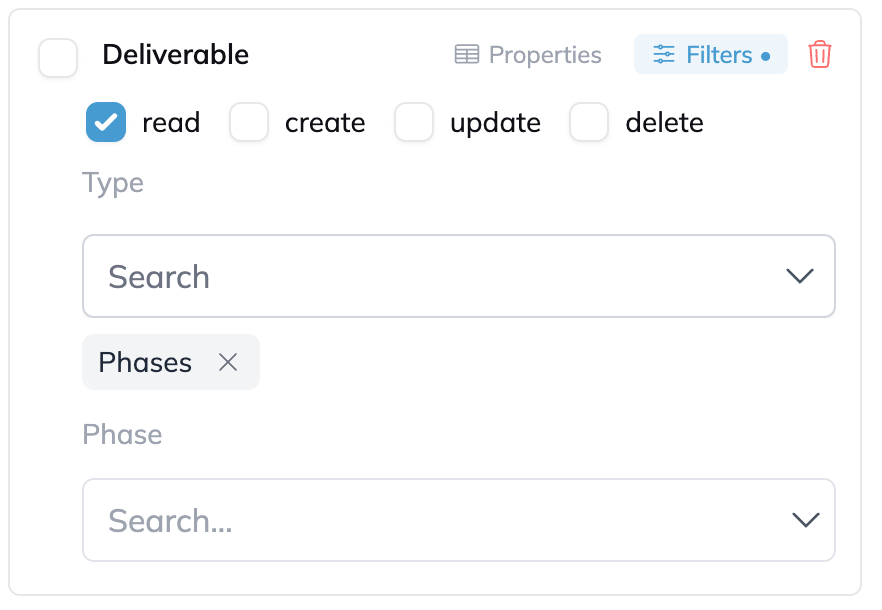
Now, select all the phases that you want to make “Read only” for this role.
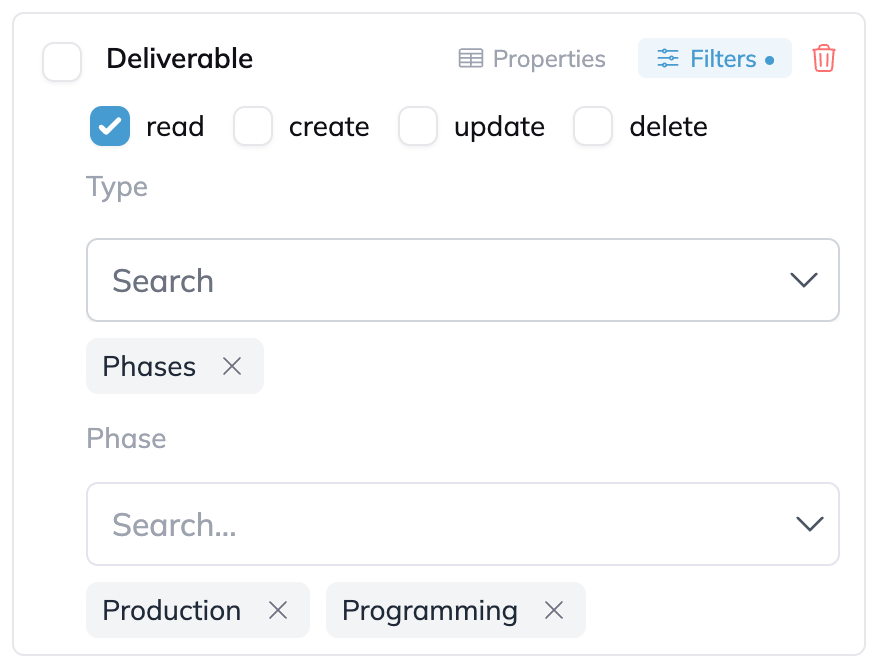
That’s it. This role will now be able to see but not edit the Production and Programming phases.
Frequently Asked Questions
A user can't upload a photo in QC or on a form. What permission are they missing?
They need Create access on the Documents module. Photo uploads route through the file upload endpoint, which requires this permission regardless of where in the app the upload is triggered.
How can I make sure my team doesn't change due dates we've already committed to the field team?
See the guide above for more information and a step-by-step walkthrough. Contact Us and we'd be happy to schedule a guided configuration session.
A user can see a QC form but can't submit answers. What's missing?
They need Create or Update access on the Form Entries module.
A user can't see any orders at all. What's the minimum they need?
At minimum, they need Read access on the Orders module. This will let them see the orders list and open individual order detail pages.
Can a user with a custom role change their own permissions?
Only if they have Update access on the Roles module. This permission should be treated with the same caution as admin access, since it can be used to self-escalate privileges.
What's the difference between Form Templates and Form Entries?
Form Templates is the configuration side: building and editing QC checklists and their questions. This is typically an admin task. Form Entries is the day-to-day usage: completing those forms on actual production orders. These are independent. A shop floor team member needs Form Entries permissions, not Form Templates permissions.
Have additional questions? Contact Us
Video walkthrough
User Roles
Still need help? Ask the team