
Departments
Managing Departments in your company
Introduction
Departments let you organize your teams by location or function—whether that's a prefab shop floor, procurement team, or design group. From the Departments screen, you can manage operating hours and breaks, assign shifts, schedule vacations and holidays, add date overrides, and configure department-specific automation and tracking settings.
Step-by-Step Instructions
Navigating to Departments
- From the left-hand menu, click Rules Engine.
- Select Departments.
You'll see a list of your departments on the left and the selected department's settings on the right. A breadcrumb at the top of the page shows Rules Engine / Departments for easy navigation.
Adding a Department
- In the Departments list, click + Add new.
- Select the time zone for that department.
- Click Save.
Once saved, you'll see tabs for Hours, Shifts, Vacations / Holidays, and Settings.
Setting Department Hours
Department hours control when the department is typically operating and available for work.
- Click the Hours tab.
- Toggle on each working day by checking the checkbox next to the day name. Non-working days display as "Not working."
- For each enabled day, set a start and end time (e.g., 09:00 AM – 05:00 PM). Use the trash icon to remove a time block.
- To add a break within a day, click + Add break under the Breaks section for that day. Set the break duration and start time.
- To add a date override—for example, a one-time schedule change—click the Add a date override button on the right side of the Hours tab.

Changes save automatically as you make them.
Managing Shifts
Shifts let you define specific working schedules for your team members, including daily hours, breaks, and staffing.

- Click the Shifts tab. You'll see a table listing all shifts with columns for Name, Total hours, and Applied to (the number of people assigned).
- Click + Add to create a new shift, or click the arrow (>) on an existing shift row to edit it.
- On the shift detail page, enter a Shift name.
- Under the Hours per day sub-tab, configure each day's schedule:
- Toggle days on or off using the checkboxes.
- Set start and end times for each working day.
-
Add breaks by clicking + Add break and entering a Duration and Starting at time.
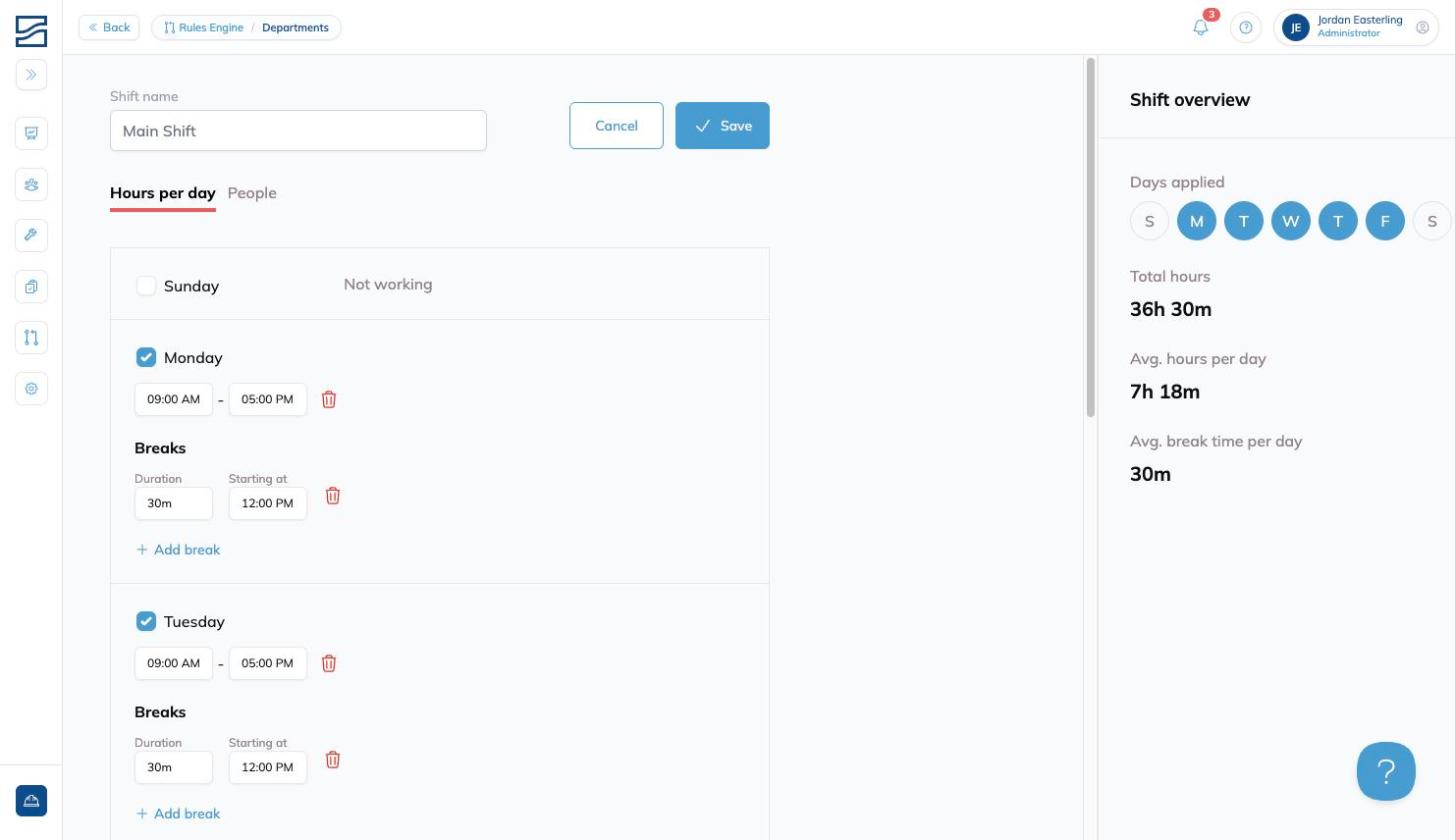
- Review the Shift overview panel on the right, which displays Days applied, Total hours, Avg. hours per day, and Avg. break time per day.
- To assign people to the shift, click the People sub-tab and then click + Apply to to add team members.
- Click Save when done, or Cancel to discard changes.

Use the three-dot menu (⋮) on a shift row for additional options.
Adding Holidays or Vacation Days
- Click the Vacations / Holidays tab. You'll see a table with columns for Name, Total hours, and Applied to.
- Click + Add.
- Enter the holiday or vacation name and the total hours off.
- Click Save.
The holiday will appear in the table and be applied to the selected department.
Department Settings
The Settings tab includes configuration options organized into several sections. Click the Settings tab to access them.
| Section | Setting | Description |
|---|---|---|
| General | Department Name | Set or update the name of the department. |
|
|
Shop location | Toggle on for locations used to physically build or assemble orders. Toggle off for departments like design or procurement. |
| Timesheets | Pay cycle duration | Select the pay cycle length (e.g., 1 week). |
|
|
First payday | Set the date of the first payday using the date picker. |
| Grace Period Thresholds | Check in | Toggle on to set a threshold for check-in entries so they are not marked as errors. |
|
|
Check out | Toggle on to set a threshold for check-out entries so they are not marked as errors. |
| Automation | Auto check-out | When enabled, users will be automatically checked out of the department at the end of their shift. |
| Dead Time Threshold | Dead Time Threshold | Set the minimum duration of inactivity that will be classified as dead time (e.g., 10 minutes). |
| Daily Planner | Auto-assignment | When enabled, workers are automatically assigned to planned orders as they check into the department. |
| Working Day | Out of Sequence Worker Stage Assignment | Enable this to allow workers to be assigned to stages out of their normal sequence. |
| Cost Codes | Cost code | Assign a cost code to the department using the searchable dropdown. |
All settings changes apply only to the selected department.
Archiving a Department
- In the department list on the left, click the archive icon (box icon) next to the department name.
- Confirm the archive action.
Archived departments are no longer active but can be restored later if needed.
Tips and Best Practices
- Use clear naming conventions for departments so your team understands which is which at a glance.
- Flag only physical production spaces as shop locations. This ensures accurate tracking of hours, labor, and assignments.
- Assign workers to shifts that match real-world schedules. This improves reporting accuracy and daily planning.
- Use date overrides for one-time schedule changes instead of modifying the regular department hours.
- Set up breaks within shifts to keep time tracking accurate and reflect real working patterns.
- Configure the Dead Time Threshold to match your workflow so inactivity is classified correctly.
Have additional questions? Contact Us