Field Requests
Share a form link so anyone in the field can ask for work, then review, approve and follow each request.
Last updated About 3 hours ago
Introduction
Crews in the field ask the shop for work all day: a call to the planner, a text with a photo, an email nobody can find a week later. Field Requests gives them one form link instead. Anyone with the link can send a request, no account needed, and each one lands in Planning under Requests.
A request stays out of production until a reviewer approves it. Nothing is scheduled, and it doesn't show in Schedule, Build, dashboards or timesheets. When you approve it, the same record becomes an order and its route starts. The requester follows it on their own private page, from your review through to the day it's finished.
Before you start. Seeing requests needs View requests. Setting up who reviews and sharing forms needs Intake settings. Review requests lets someone decide on any request, even one they aren't a reviewer on.
Not seeing Requests? Reach out to your company admin to update your permissions. See the Roles guide.
Video walkthrough
Step-by-Step Guide
1. Set Up a Request Form
A request form is an ordinary form with one setting turned on. Its questions decide what the request is called, when it's needed, and any details you want on the order.
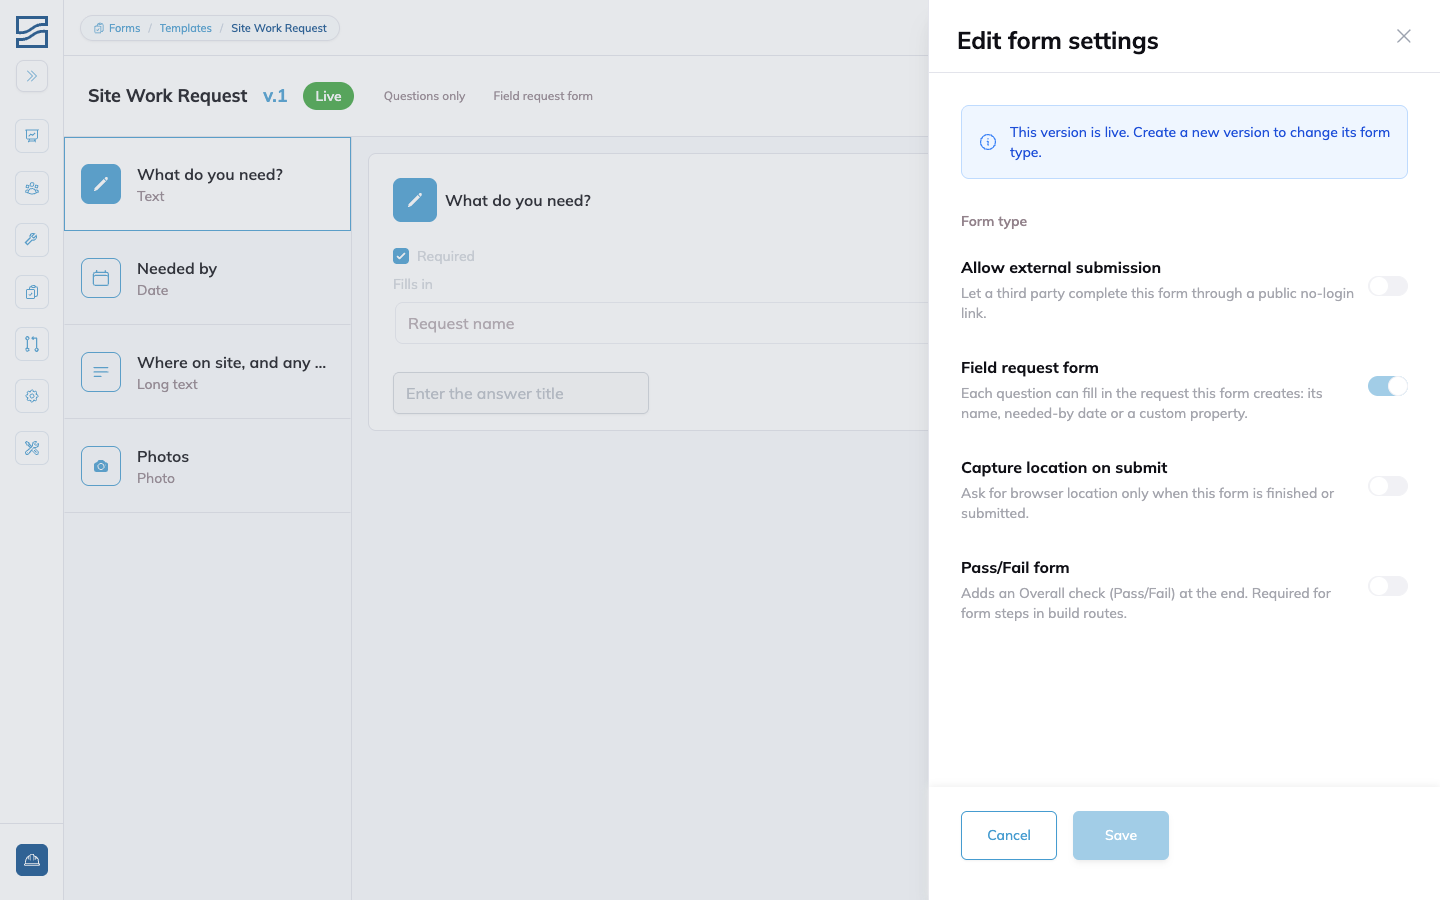
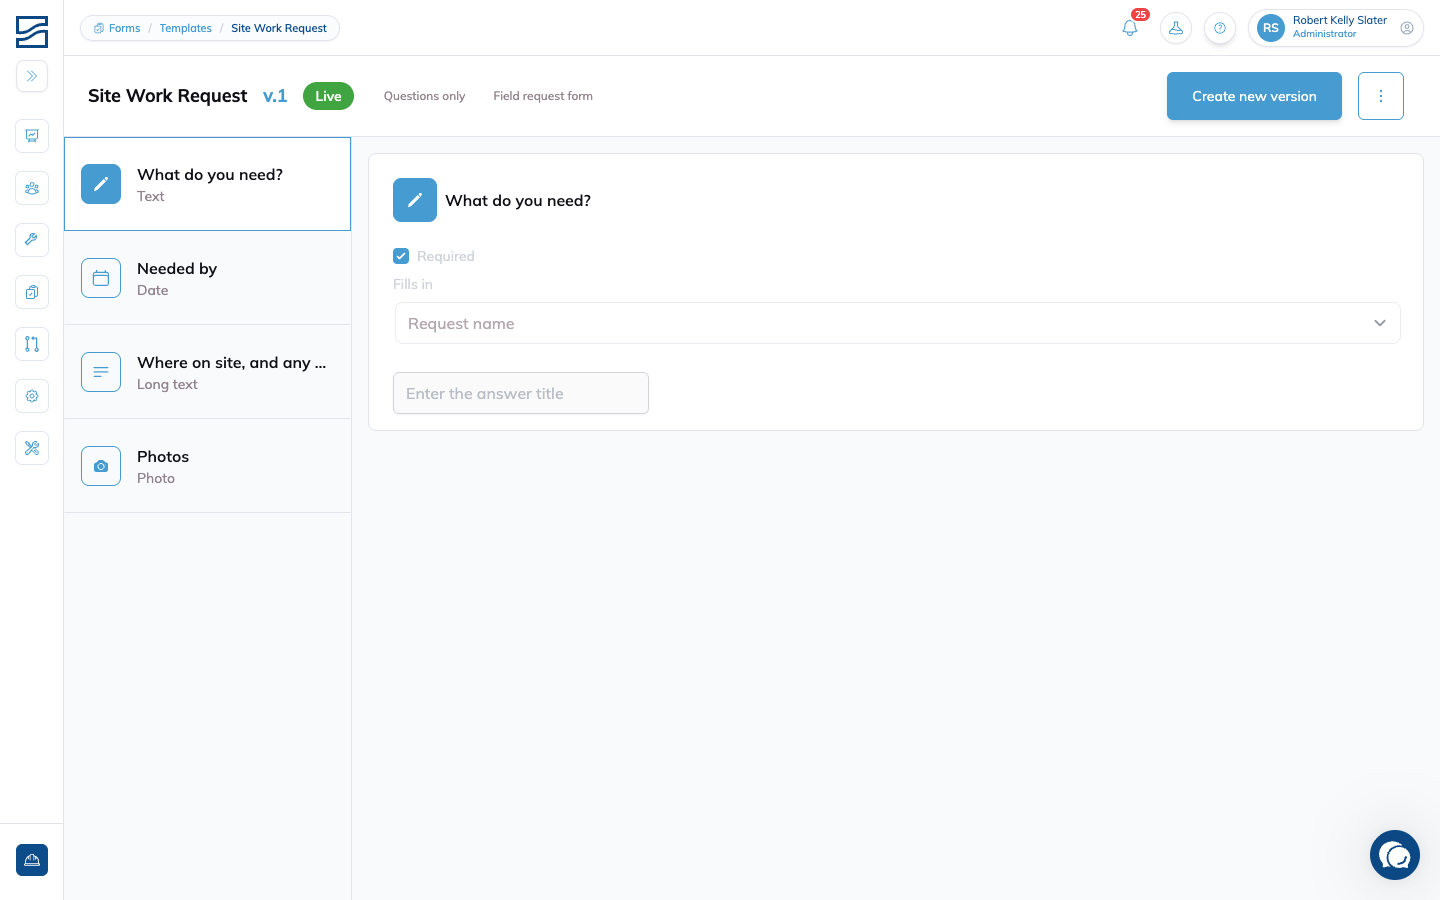
Open the form in the form builder, open the menu (⋮) at the top right, and click Edit.
Turn on Field request form. The form needs to be questions only, so turn off Pass/Fail first if it's on. On a form that's already live, click Create new version first: a live version's form type can't change.
On each question, use Fills in to choose what its answer fills in on the request: its name, its needed-by date, or one of your custom properties.
Make sure one question fills in the name, then publish the form.
Answers that don't fill in anything still travel with the request as the submitted form, so you can ask for as much detail as you need. Every question can take a photo or a file. See the Forms guide for building the questions themselves.
2. Choose Who Reviews
Reviewers are set once for the whole company. Any one of them can approve a request.
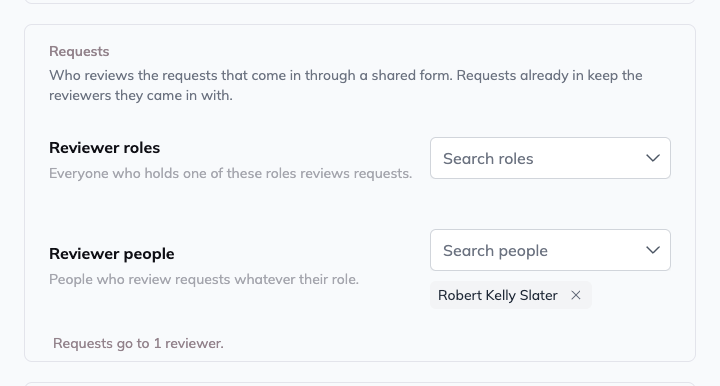
Open Company Settings and find the Requests section.
Under Reviewer roles, pick the roles whose members review requests.
Under Reviewer people, add anyone else who should review, whatever their role.
Nobody reviewing means nothing to share. A form can't be shared until at least one person would get its requests. Requests already in keep the reviewers they came in with, so changing this list only affects new ones.
3. Share the Form
Each share link belongs to one form and one project. Every request sent through it lands on that project.
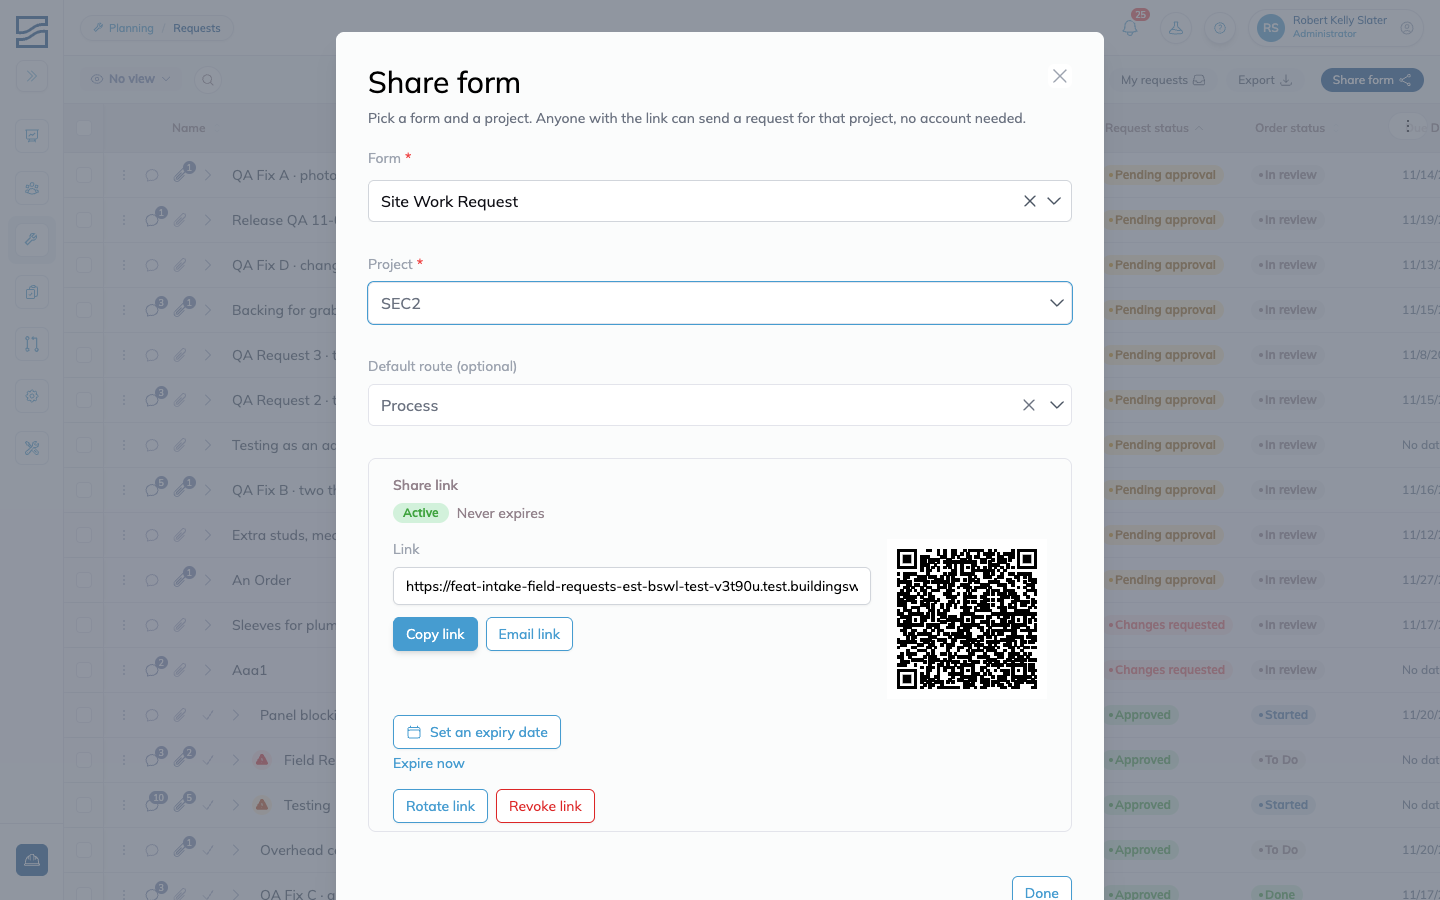
Go to Planning > Requests and click Share form.
Pick the Form and the project.
Choose a default route if you want one. Approved requests from this link start on it, and the requester never sees it.
Send the link the way your crews already talk: Copy link, Email link, or the QR code to print and post on site.
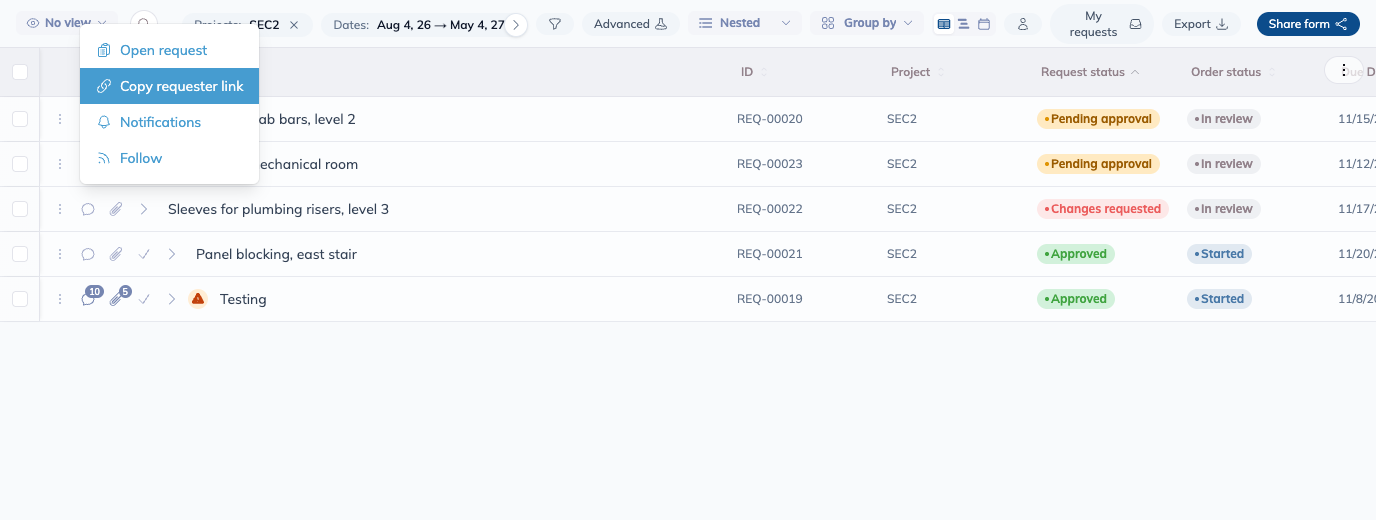
Building Swell never sends the share link for you. You decide who gets it. To pass one request's private page to someone outside your team, use Copy requester link from that request's row in the Requests table, while it hasn't been approved yet.
4. What the Requester Sees
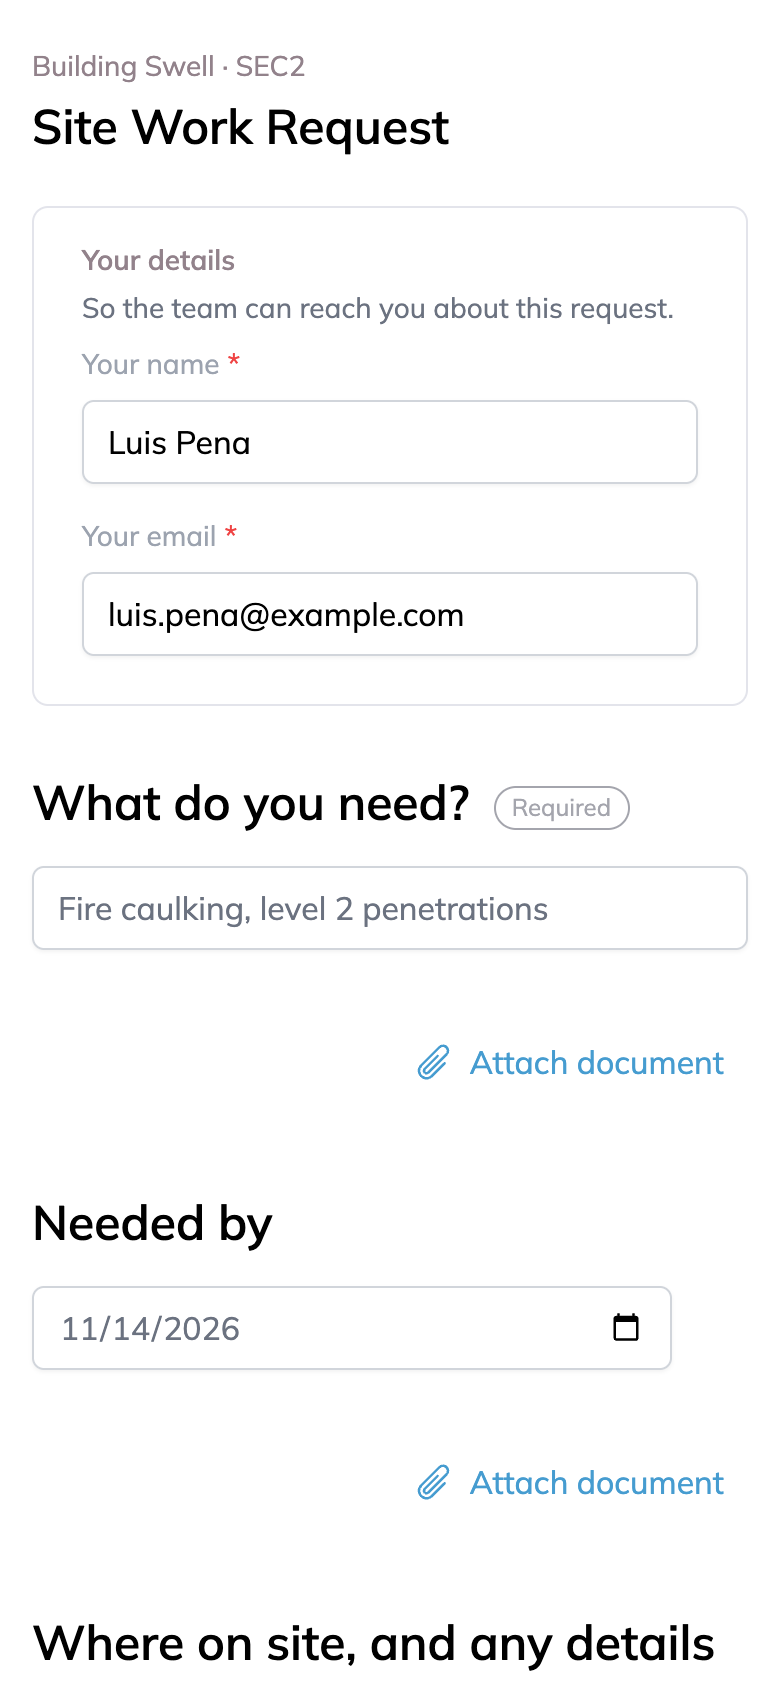
The requester opens the link on their phone or computer. They give their name and email, answer the form, add photos, and press Send request. Sending twice, or tapping it again on a slow connection, still makes one request.
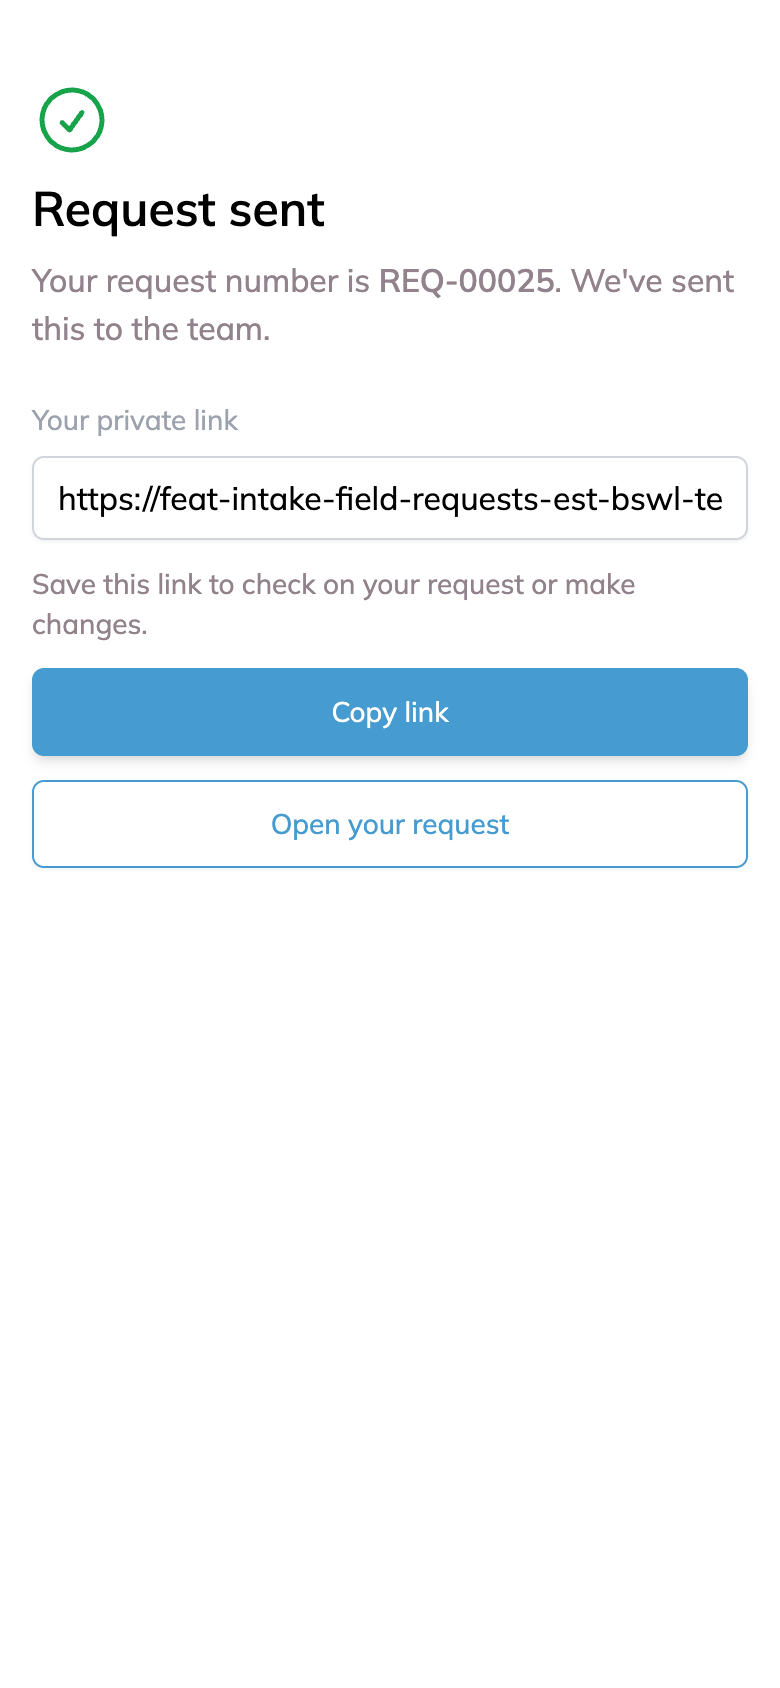
The confirmation screen gives them a private link to their request, and we email it to them as well. That link opens their own page, with three tabs:
Request: what they asked for. When you request changes, they edit it here and send it back. They can cancel it any time before it's approved.
Comments: their conversation with your team.
Documents: the photos and files from their form, files they add later, and any file your team shares with them.
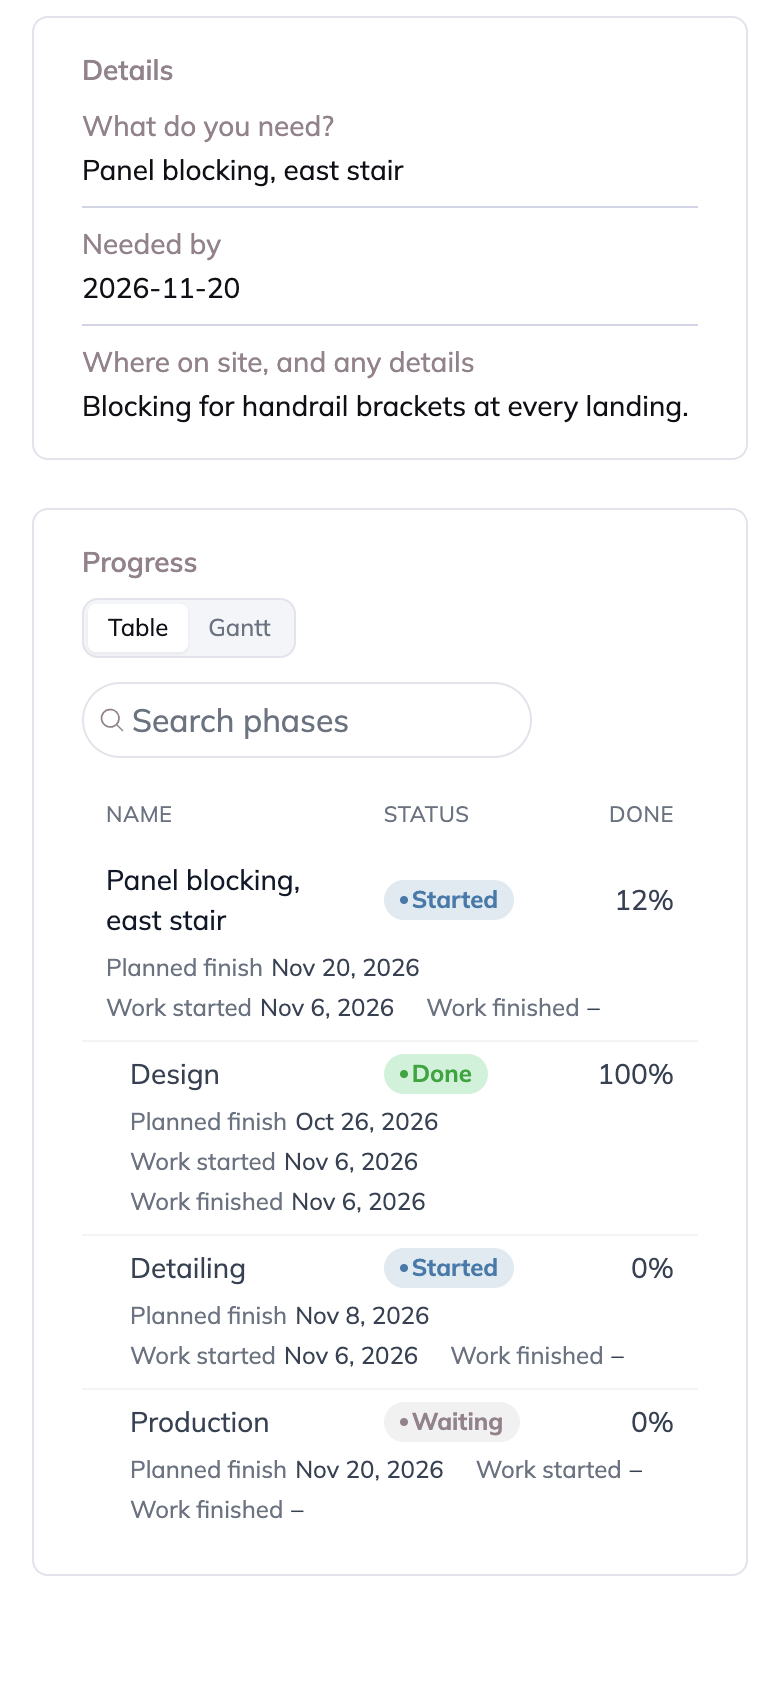
Once the request is approved, the Request tab also shows its progress: its status, how far along it is, the planned finish, and when work started and finished. A switch shows the same phases as a Table or a Gantt.
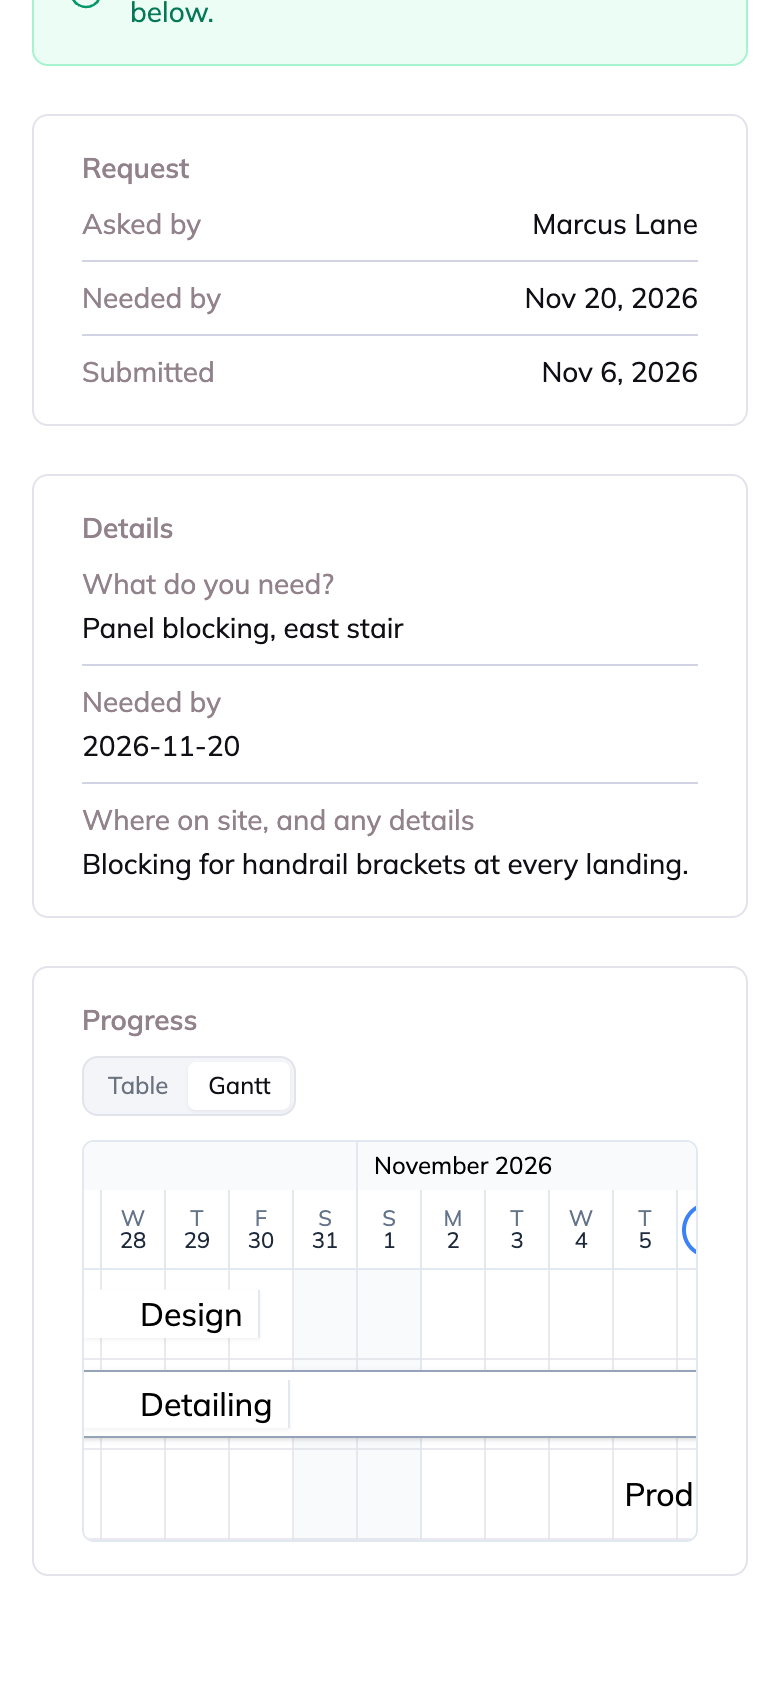
Someone without an account hears about their request by email. They get one:
when the request is sent, with their private link
when changes are requested, and when it's approved or declined
when your team changes the request's name, needed-by date or details, with what changed
when your team replies on Requester or shares a file with them
when the order starts, goes on hold, finishes, or is closed without finishing
when the order's due date or planned finish moves
Someone who sends a request while signed in gets the same updates in the app. They find their requests under My requests, with each one's Request status and Order status and a count of its comments and documents.
5. Review a Request
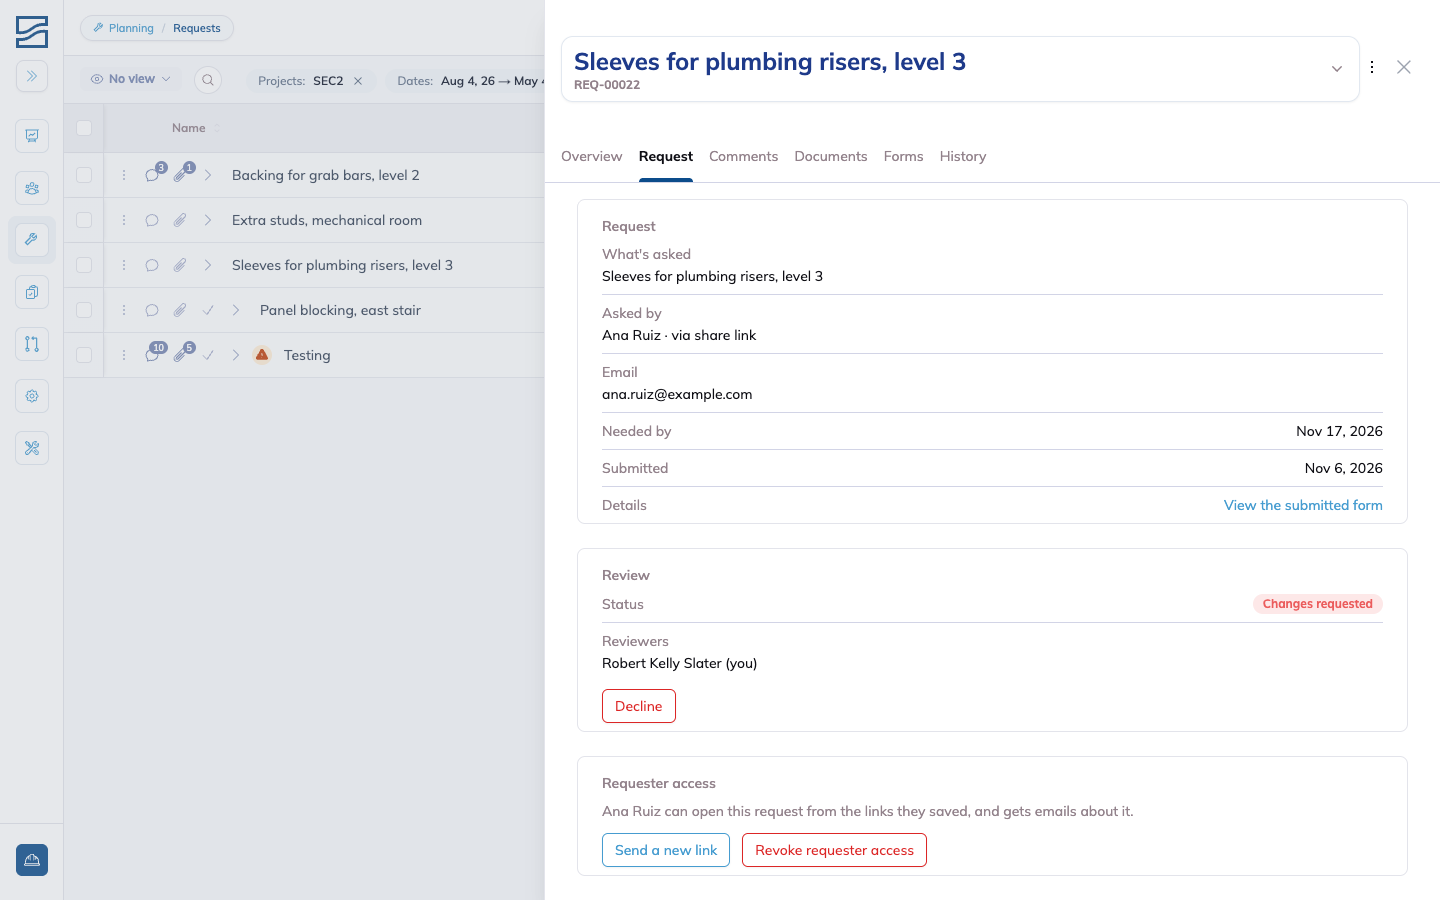
Reviewers are told about each new request in the app and by email. The link opens the request on its Request tab, which shows what's asked, who asked, the reviewers, and the form as it was sent.
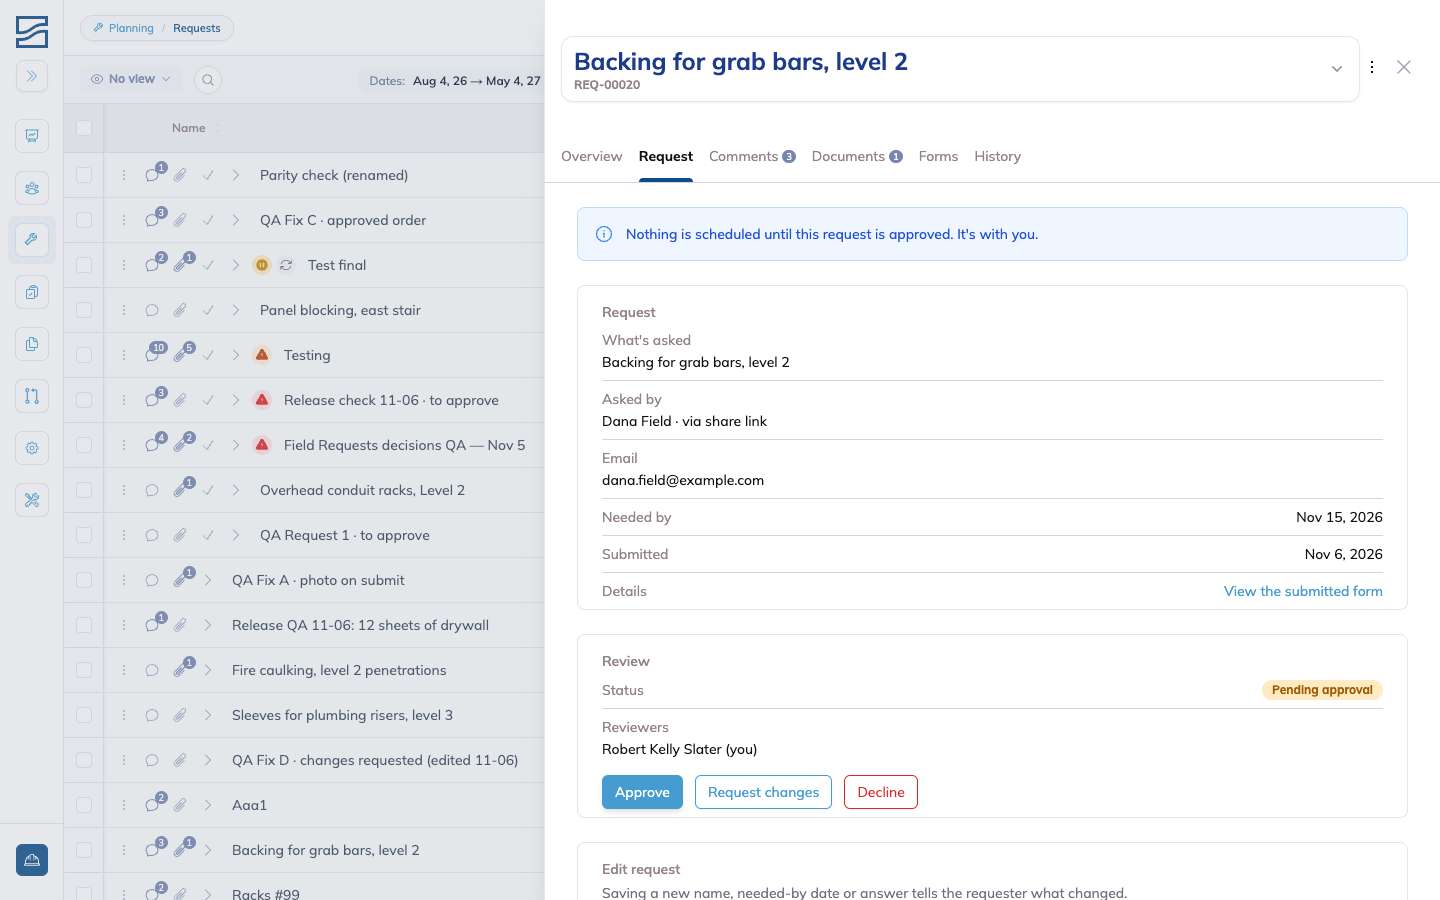
Open the request from Planning > Requests.
Read the Request tab. Fix the name, date, route or details first if they need it. Saving a new name, needed-by date or answer tells the requester what changed, and so does changing the name or due date right in the Requests table.
Pick one decision:
Approve: it becomes an order and its route starts.
Request changes: it goes back to the requester, with a note if you add one.
Decline: it closes without becoming an order. The requester reads the reason you give.
To clear several at once, for example a batch of test sends, select them in the table and click Decline. They all close with one reason, and their requesters aren't emailed.
Assign people to a request the same way you assign them to an order. Whoever is assigned gets its notifications, for new comments, new files, a resubmission, and status changes, and keeps getting them once it's an order.
6. Talk With the Requester
A request has two conversations, under one Comments tab. A switch at the top moves between them.
Requester: the conversation the requester reads. They see every comment here, and someone without an account gets an email about each new one.
Team: notes for your team only. The requester never sees them.
The count on the Comments tab and on the table adds both conversations together. Each side of the switch shows its own count.
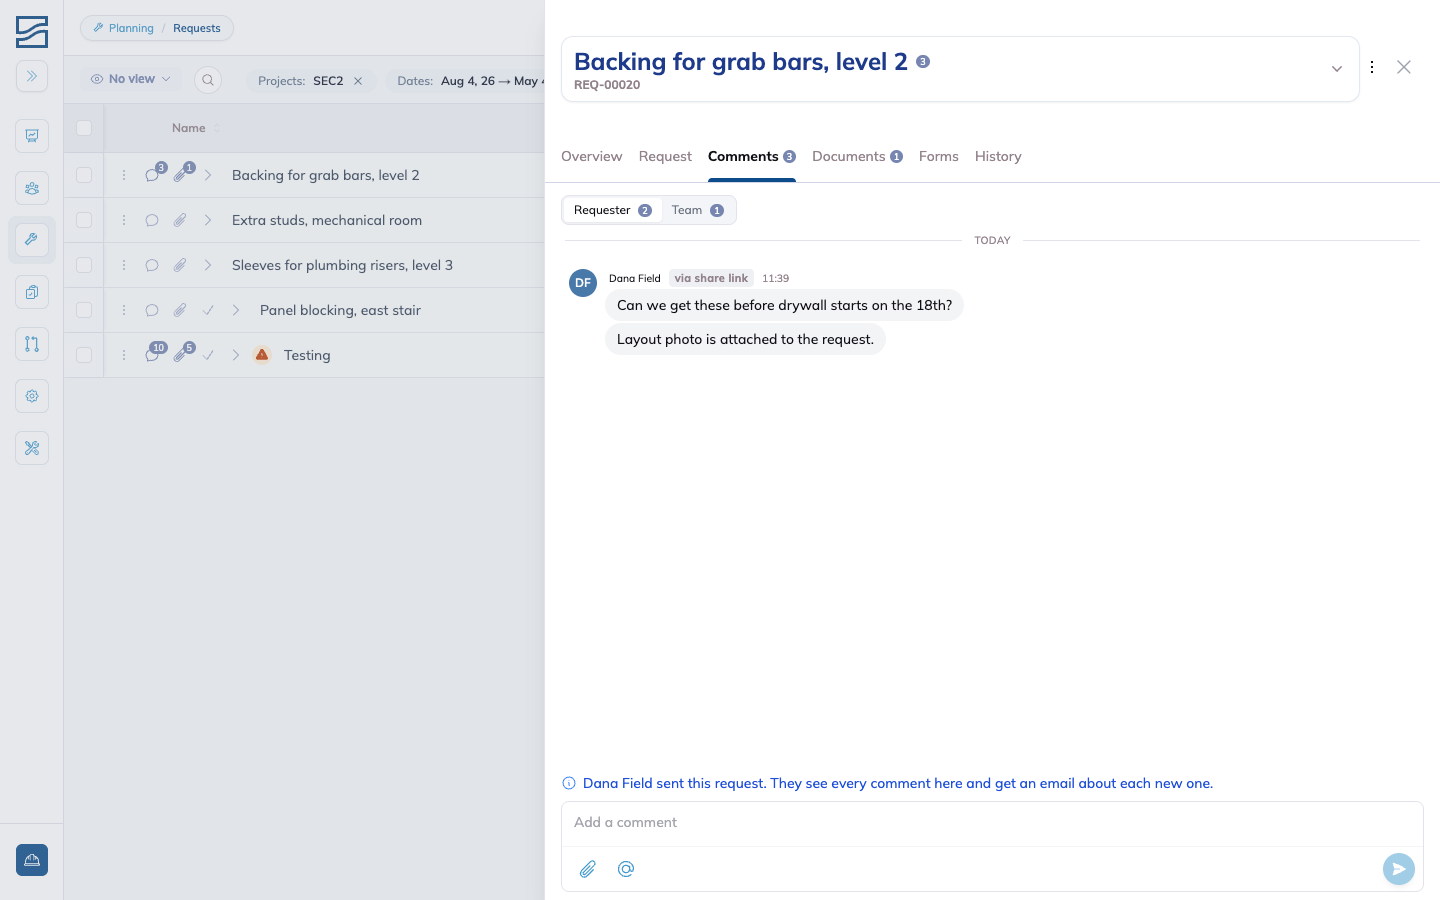
Files work the same way. When you upload a file on the request's Documents tab, you choose whether the requester can see it. You can change that later from the file's row menu with Share with or Stop sharing with. A pill on each file says what the requester sees.
7. After Approval
Approving doesn't copy anything. The request becomes the order, keeps its REQ number, and shows in Schedule with its route started. The Request tab stays on it, read-only, as the record of what was asked, and Overview says when it was approved and by whom.
The requester keeps their page. They can still comment and add files while your team works the order.
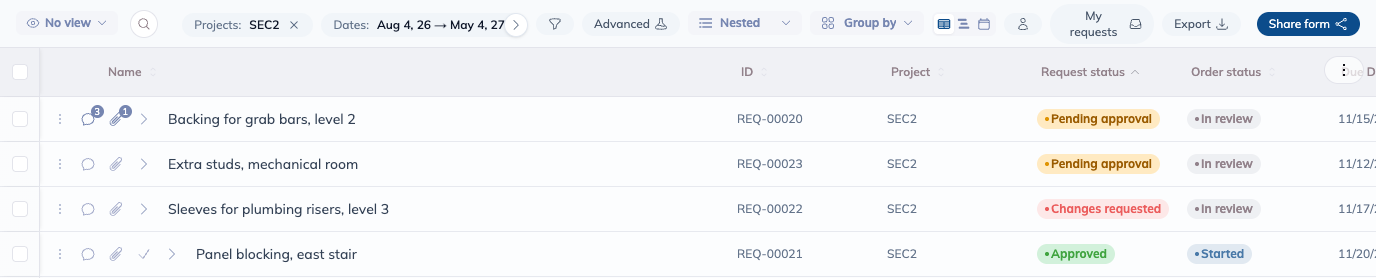
The Requests table shows two statuses for every request:
In review shows anywhere the record appears, so nobody mistakes a request for scheduled work. Declined and cancelled requests leave the list by default, the way closed orders do. Filter Order status to Closed to see them.
8. Manage Links
The requester's private links live on the request's Request tab, under Requester access.
Send a new link turns off the links they have and emails them a fresh one. Use it when someone loses theirs.
Revoke requester access turns their links off. They stop getting emails about the request.
Private links stop working on their own 30 days after the request is over, that is once it's cancelled, declined, or its order is finished.
The share link is managed from Share form. Set an expiry date or expire it now, Rotate link to replace it with a new one, or Revoke link to stop it taking requests. Requests already sent through it stay as they are.
Tips
Put the QR code where the crew already looks. A printed code in the site trailer gets used more than a link in an email.
Map the name and the needed-by date. They're what your planners see first in the Requests table.
Write the decline reason for the person reading it. The requester sees it word for word.
Keep shop talk on Team. Anything on Requester goes to the person who asked.
Assign the planner who owns the job. They hear about every reply without checking the table.
FAQ
Does the requester need an account?
No. They give a name and an email on the form. Their private link is how they get back to the request.
Does a request use any capacity before it's approved?
No. Nothing is scheduled, and no time can be logged on it. It shows in Requests only until you approve it.
Can the requester see our internal comments?
No. They only see the Requester side of Comments, and only the files you choose to share with them.
What if the requester lost their link?
Open the request and click Send a new link under Requester access. The old links stop working.
Can I undo a decline?
No. A declined request stays closed and read-only. The requester can send a new request if they still need the work.
Conclusion
Field Requests turns asks from the field into requests your team can review, approve and schedule, without anyone retyping them. The requester follows their request on one page and hears from you at each step.
For the rest of the plan once a request is an order, see the Planning guide.
Need help? Hit the chat button or click "Ask" in the app. You can also reach us at support@buildingswell.com.
Was this helpful?
Still need help? Ask the team