Planning Views
Save the columns, filters and settings you use on a page, then choose who else can see it.
Last updated 26 days ago
Introduction
A saved view remembers how you've set up a page.
The columns you've chosen, the filters you've applied, and the page's settings all get stored together under a name you pick. Switch to the view and the page comes back exactly as you left it.
You can keep a view to yourself, share it with specific people, or make it available to everyone in your organization.
Save your current setup as a view
Set the page up the way you want it. Choose your columns, apply your filters, adjust the settings.
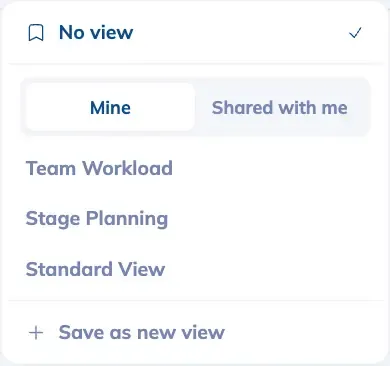
Open the view selector at the top of the page.
Choose Save as new view.
Give it a name under View name. Something like "My active orders" works well. Name it after what it shows, not after the filters you used, so it still makes sense to whoever opens it next.
Pick who can see it, then choose Create view.
Choose who can see it
Under Who can see this view there are up to three options.
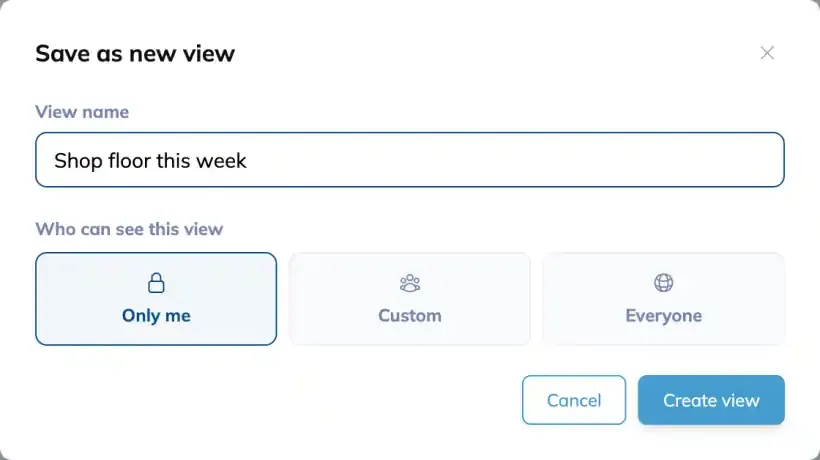
Only me
The default. Nobody else sees the view or knows it exists. Use this for the setups you're still working out.
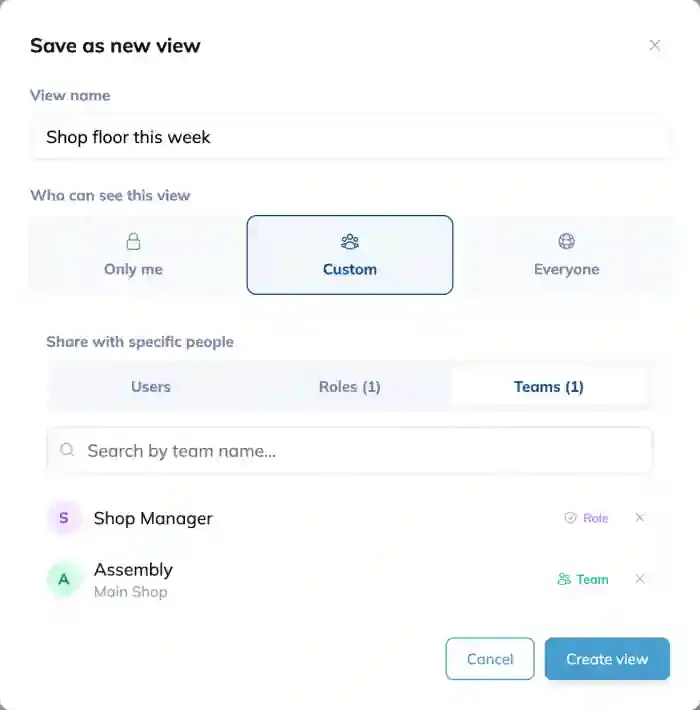
Custom
Share with specific people. Once you pick Custom, you can search and add across three tabs:
Users picks individual people by name or email address.
Roles shares with everyone holding that role. People who get the role later see the view automatically.
Teams shares with a whole team.
You can combine them. A view can go to two named people, one role, and a team all at once.
You can't remove yourself from a view you created.
Roles and Teams are worth preferring over Users when the view maps to a job rather than to a person. Sharing to a role means you don't have to remember to update the view when someone joins.
Everyone
Everyone in your organization sees the view. Use it for the setups that are genuinely standard, like the one your whole team should start their day on.
Everyone only appears if you have permission to share organization-wide. If you don't see it, that's why, and an administrator can grant it.
If you can't share with everyone
The Everyone option is hidden unless you have the Share Saved Views with Everyone permission.
There's one case where you'll see it greyed out instead of hidden. If you shared a view with everyone while you had the permission, and the permission was later removed, the option stays visible but disabled, and hovering it explains that you no longer have permission to share with everyone. The view stays shared with everyone. You just can't change that setting any more, and you'll need an administrator to either restore the permission or adjust the view for you.
Grant the permission
Administrators can grant organization-wide sharing from user management.
Go to your permission settings and open the role you want to change.
Find Share Saved Views with Everyone.
Turn on create.
This permission only has a create action. There's nothing to read, update, or delete, because it controls one thing: whether someone can set a view's visibility to everyone. It doesn't affect whether they can see views other people have shared.
Edit or reshare a view
Open the view, then choose Edit view from the view selector. You can rename it and change who can see it. Choose Save when you're done.
Changing who can see a view takes effect immediately. If you narrow a view from Everyone to Custom, people who relied on it lose access straight away, so it's worth a heads-up first.
Was this helpful?
Still need help? Ask the team