Managing Routes
Edit, duplicate, link, and archive routes, and understand Process versus Department routes.
Last updated 6 days ago
Introduction
Once a route is built, managing it means editing it, copying it where it's needed, and retiring it when it's done. You will work from the route list, meet the two kinds of route, use the whiteboard editor, link routes together, and read the times shown on the header.
Process Routes and Department Routes
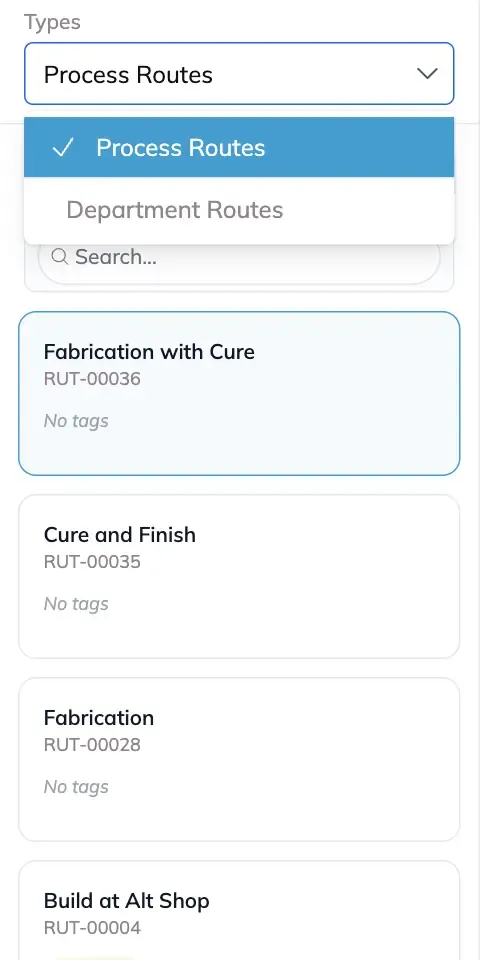
The route list opens with a Types dropdown holding two options.
Process Routes. The overview of your full process, start to finish. It follows the work from one department to the next, so you can see the whole path a job takes.
Department Routes. The route a specific team or department runs. It's their piece of the work. Choosing this shows a Department picker so you can pick whose routes you're looking at.
A Process Route can hold a Department Route inside it, through a component. That is how the full process strings together the work each department runs. See Linking Routes Together below.
The difference matters for times. A Department Route runs on that department's shift, so its Duration follows that shift. See Cycle Time, Duration, and Float.
Step-by-Step Guide
Building the Route
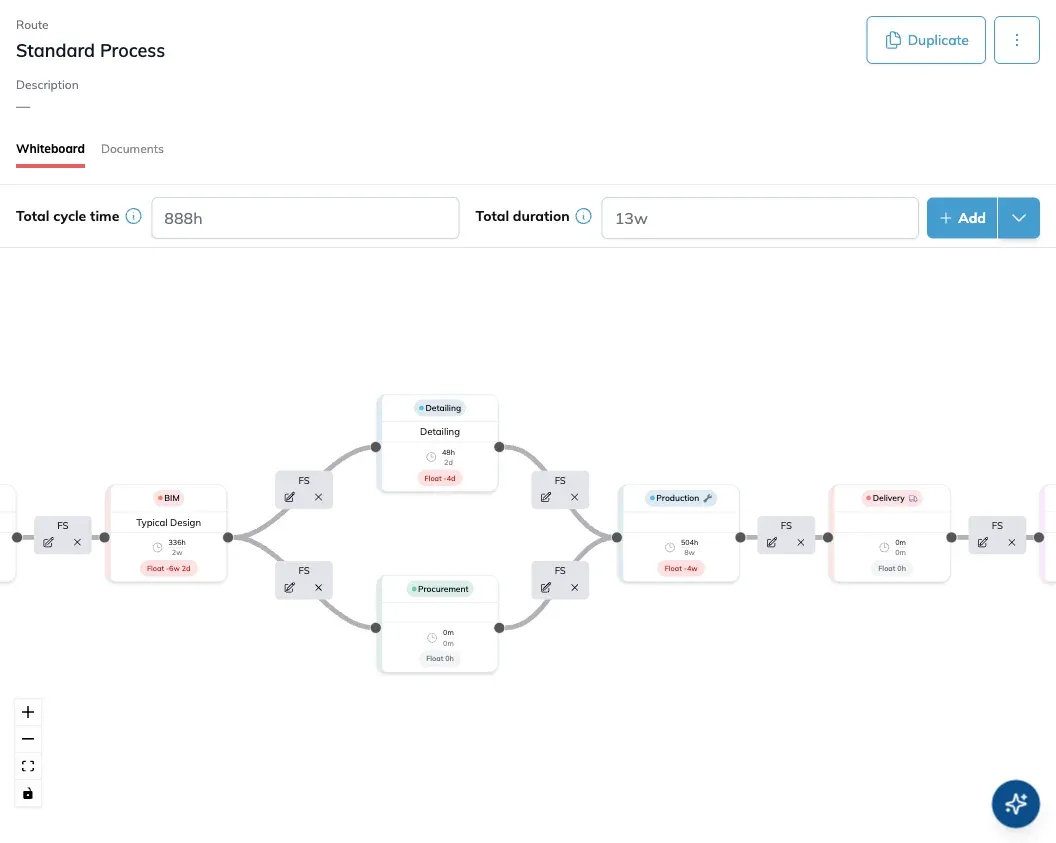
Opening a route gives you two tabs. Whiteboard is where you build the sequence, and Documents holds anything attached to the route.
On the whiteboard each stage is a card, and the lines between them show the order the work moves in. Cards carry a phase label, the stage name, and its times.
Drag stages around to lay the route out however it reads best for your team.
Connect one stage to the next to set the order the work runs in. Drag from the handle on one stage to the handle on the stage that follows it.
Each connection has a Type, which defaults to Finish to Start, and an Offset if the next stage should wait. The connection is labelled on the whiteboard, so you can read the sequence without opening anything.
Changed your mind partway through a connection? Cancel it and nothing is saved.
Use the pencil on a connection to change it, or the × to remove it. Stages are removed the same way.
Use full screen to give a big route the whole window, and exit full screen to come back.
Connected stages space themselves out so the labels stay readable. You don't have to lay a route out by hand to keep it clear.
Linking Routes Together
A route can carry other routes inside it. This is how you build a route of routes, so a whole job runs as one route. You add a component to the route and give the component a route of its own. When an order uses the parent route, every linked route comes with it: its stages, steps, documents and materials.
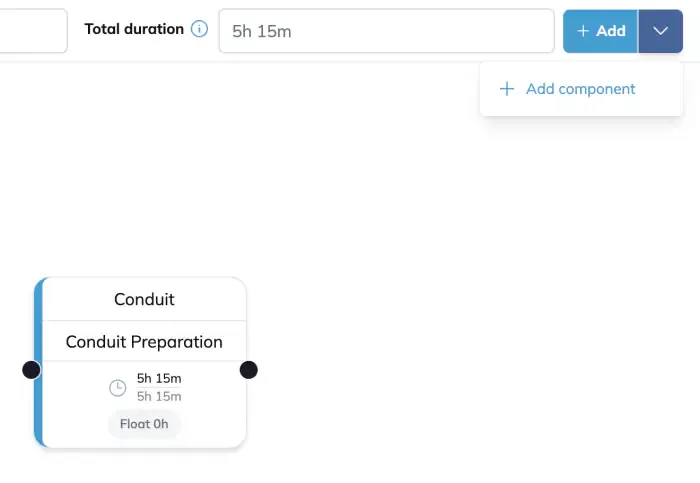
On the Whiteboard, open the Add dropdown and choose Add component.
Click the whiteboard where the component should go. It appears as New component.
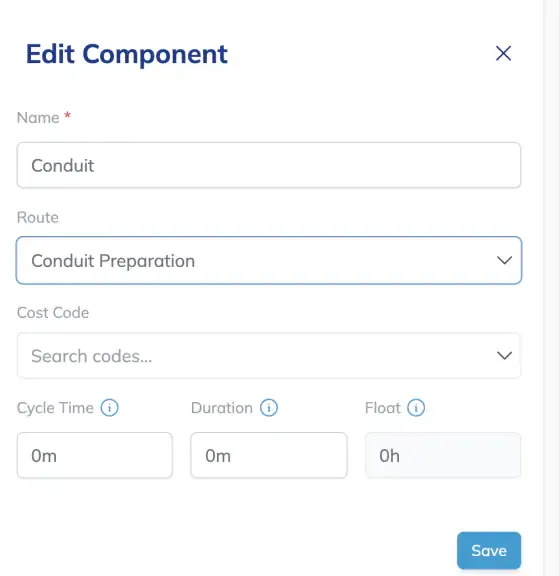
Double-click the component to open it.
Give it a Name your team will recognize, such as "Framing".
Pick the route it should run in the Route field.
Click Save. The card now shows the linked route's name, and its Cycle Time and Duration come from that route.
Connect the component to the rest of the route like any stage.
A linked route can contain linked routes of its own, and the same route can be linked in more than one place.
Phases work the same way. Open a phase on a Process Route and pick a route in its Route field. A phase with a Department set only lists that department's routes, so a Process Route can carry one phase per department, each running that department's route.
On a Department Route, you can only link routes from the same department. To bring several departments together, build the parent as a Process Route.
What It Looks Like on an Order
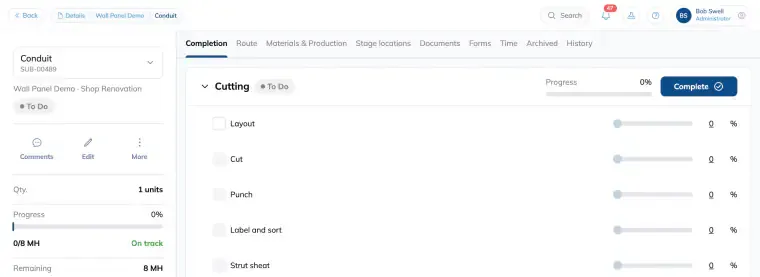
When you add an order with a route that links other routes, each linked component comes along with its own stages and steps.
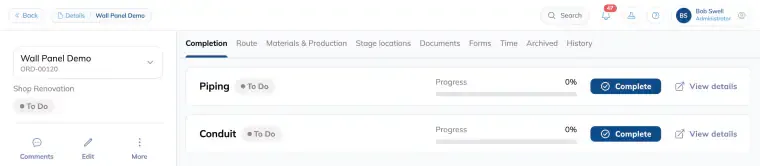
Open the order. The Completion tab lists each linked component with its own progress.
Click View details on a component. It opens with the stages and steps from the route it links, ready for the floor to work.
Route Times
Above the whiteboard you get Total cycle time and Total duration for the whole route.
Each stage card carries its own numbers: the cycle time and duration together, plus a Float chip. Cards containing a wait step are marked. See Cycle Time, Duration, and Float.
Editing a Route
Use Edit on the route header to change the route's name and description.

Duplicating a Route
Use Duplicate to copy a route. Rename the copy, and point it at a different department if that's what you need. Copying to another department is the fast way to start from a process you already trust.
Check the stages still make sense for where you've copied it. A duplicate carries the original's structure, and that structure was built for the original's context.
Archiving a Route
Use Archive on the route header and confirm. The route leaves the active list and stays on the work that already used it. See the Archiving and Restoring Data guides.
Tips and Tricks
Name routes to a convention. These names surface across planning and the shop floor.
Duplicate rather than rebuild. Then prune what doesn't apply.
Check Duration after copying to a new department. Same route, different shift, different calendar time.
Set People to 0 on cure steps. It's how Building Swell knows not to scale them to a shift.
Link Department Routes into one Process Route. Each department keeps its own route, and the Process Route strings them together.
Name the component after the work it holds. The name is what the floor sees on the order.
FAQ
How do I try a change without affecting the team?
Duplicate the route, change the copy, and switch over when you're ready.
What's the difference between a Process Route and a Department Route?
A Process Route describes the process. A Department Route is that process as a given department runs it, with that department's shift driving Duration.
Can one process run in several departments?
Yes. That's what the split is for.
Why do the same stages show different Durations in two departments?
Different shifts. The work content is identical, the calendar time isn't.
If I change a linked route, do existing orders update?
No. An order gets a copy of the route when it's applied. New orders get your changes, and orders already in progress keep the version they started with.
Can a route contain itself?
No. If a link would loop back to the route you're editing, Building Swell won't save it and tells you why.
Can I link a route to a component on an order?
Yes. Pick a route in the component's Route field on the order, and its stages are added right away.
Conclusion
Pick the right type, lay the sequence out on the whiteboard, link department routes into one process route, and watch the header totals when you move a route between departments.
Need help? Hit the chat button or click "Ask" in the app. You can also reach us at support@buildingswell.com.
Still need help? Ask the team