Build
Your live shop floor view: every active order, who is on it, and how far along it is.
Last updated 18 days ago
Introduction
Build gives you a live view of every active order, who is working on it, and how far along it is. It is where the shop floor runs its day. You will find your way around the page, assign people to stages, and update progress as work moves.
Step-by-Step Guide
Getting There
Click the hard hat icon in the bottom left of the screen to open Build.
General Menu
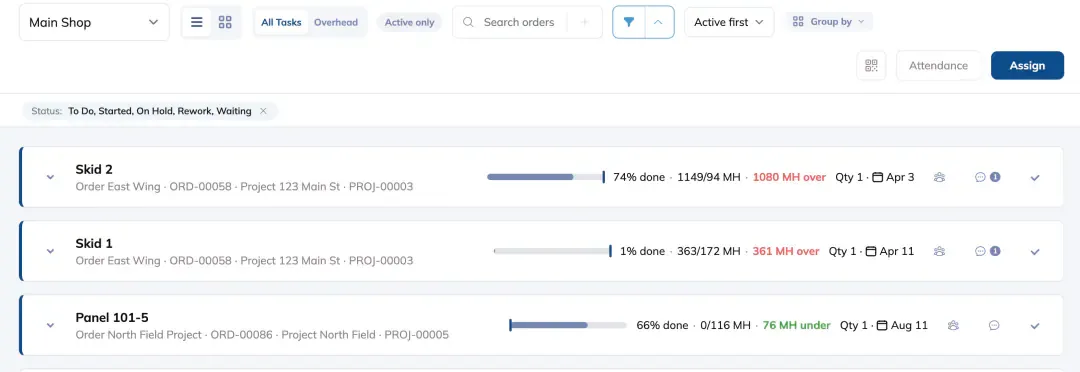
The Build page has a set of controls at the top that let you filter, sort, and navigate your work.
Notifications
The bell icon in the top right shows your notification feed. A badge appears when you have unread activity, such as mentions, comments, or status updates tied to your orders.
Tracking Time
There are four ways to assign team members to a stage from the Build page.
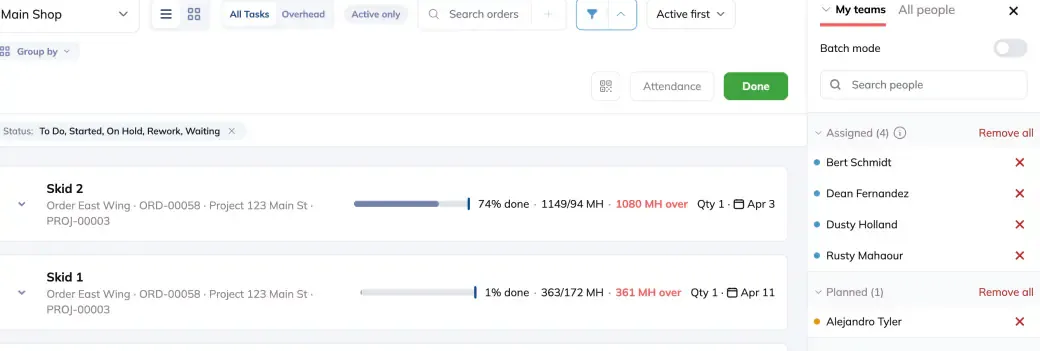
Via the Assign panel: Click the Assign button in the top right. A panel will slide in showing your team members.
Those already assigned appear at the top with a remove (×) button.
Everyone else appears below with a (+) button.
Click (+) next to a name to add them to the currently selected stage.
Via the Assign people button on an order (ideal for mobile): Each order card in List view has an Assign people button.
Tap or click it to jump straight into assigning for that order, with its first unfinished stage already selected.
This is the quickest option when working on a phone or tablet.
Via drag and drop: With the Assign panel open, each unassigned team member has a drag handle to their left. Drag a name from the panel and drop it onto the stage you want to assign them to.
Via QR code: Scan either the user or the order first, then scan the other. Click OK to confirm, and the time tracking session will start automatically.
Batch Mode
Batch mode lets you assign one or more team members to multiple stages across orders in a single action, useful when a worker is moving through several jobs at once.
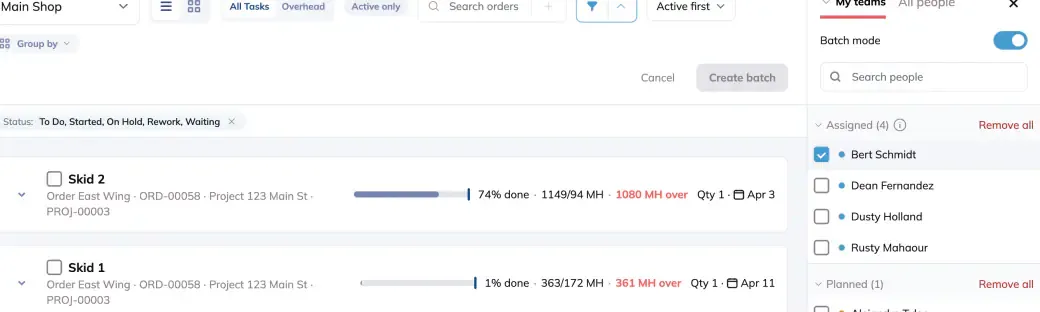
Click Assign to open the panel, then toggle Batch mode on.
Checkboxes will appear on each stage in the order list, along with a "Select all Stages" option at the top of each order.
Check the stages you want to include, then select the team members to assign from the right panel.
A counter at the bottom tracks how many people you've selected.
Click Create batch to apply the assignments, or Cancel to exit without saving.
Updating Progress
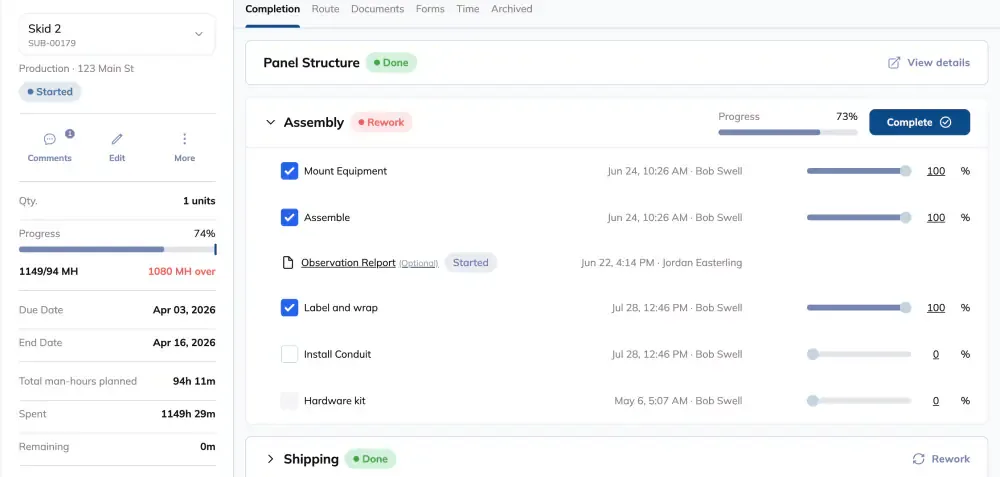
You can update stage progress without leaving the Build page.
Expand an order by clicking its row (List view) or finding it in Grid view.
Each stage has a checkmark icon on the right side. Click it to open the progress panel for that stage.
You'll see each individual step listed with:
A checkbox
A quantity counter (e.g., 1 / 1)
+ / - buttons to adjust completed units
Check the box next to a step to mark it complete, or use + / - to increment the count.
Once all steps are done, click Complete to mark the entire stage as finished.
QC Forms: Some stages have QC inspections or forms attached. When a form is required, it will appear as you update progress.
Click the form to open it and fill it out.
You can also start a new form at any time by clicking the three-dot and selecting Start Form.
Flagging Rework: If a step or stage needs to be redone, click the rework button to open this up and trigger rework. This sends the stage back for correction and notifies the relevant team members.
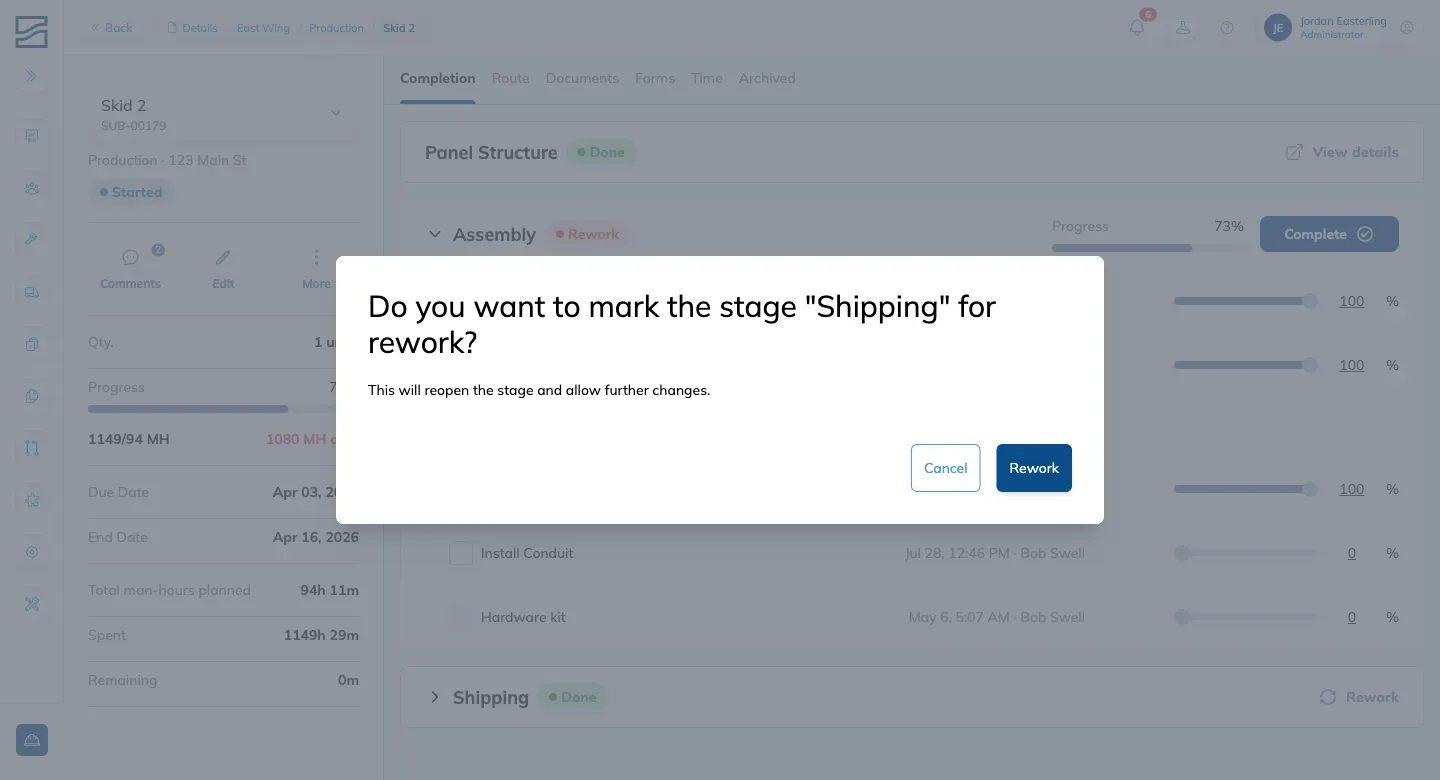
What the figures on each card mean, including MH over and On track, is covered in Progress and Man-Hours.
Opening Order Details
To view full details for any order, click the order title from either List or Grid view.
This takes you directly to the Order Details page, where you can review quantity, overall progress, ETA, and man-hours planned vs. spent.
From there you can also leave or read comments in the Discussion panel, edit order information, or put the order on hold using the More menu.
Tips and Tricks
Use "Active only": Keep the view clean during a busy shift. It hides anything already done.
Grid vs. List: Grid view is great for a visual overview; List view is better for walking through stages one by one.
Batch mode: Most useful when a crew is working through multiple orders at the same stage simultaneously.
Conclusion
Build keeps your entire shop floor visible in one place. Use it to assign work, track stage progress, and stay on top of what's moving, all without leaving the page.
Have additional questions? Contact Us
Video walkthrough
Getting to Build
Assigning Yourself or Teammates
Configuring Build for You
Still need help? Ask the team