Updating Orders When a Route Changes
Bring the orders built from a route up to date after the route changes, and choose what happens to work that has already started.
Last updated About 20 hours ago
Introduction
Routes change. You add a QC stage, split a step in two, or drop one your team no longer runs. Saving the route only changes the route, so the orders already built from it stay as they were.
This guide shows you how to bring those orders up to date, one at a time or all at once, and how to choose what happens to work the floor has already started.
Before you start. You need permission to edit the orders you update. To update every order from the route itself, you also need permission to edit routes.
Video walkthrough
Watch Updating Orders When a Route Changes (2:04)
The Three Ways to Apply
Every time a route is applied to an order that already has it, Building Swell asks how. You pick one of three modes.
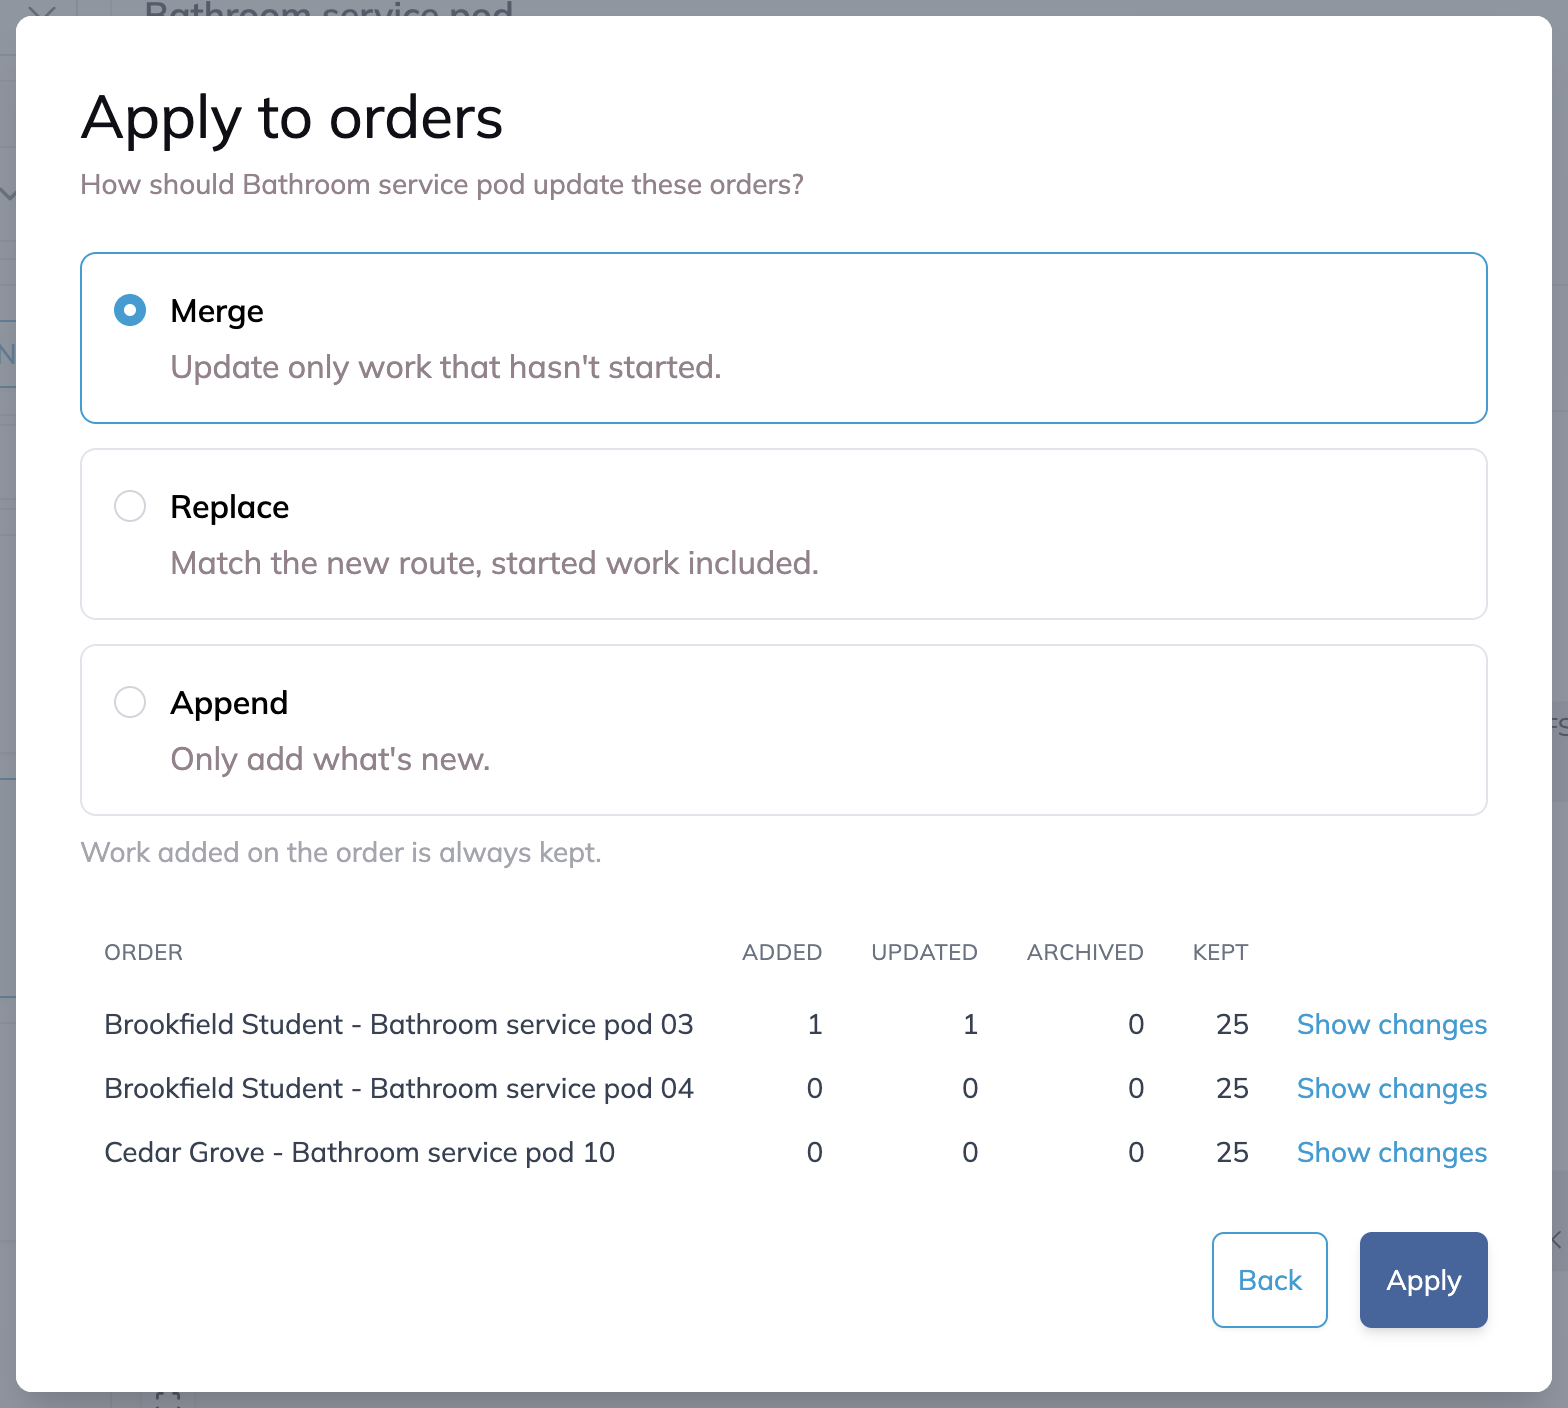
Merge. Update only work that hasn't started. Anything started stays exactly as it is.
Replace. Match the new route, started work included. Logged progress stays.
Append. Only add what's new. Nothing on the order is changed or archived.
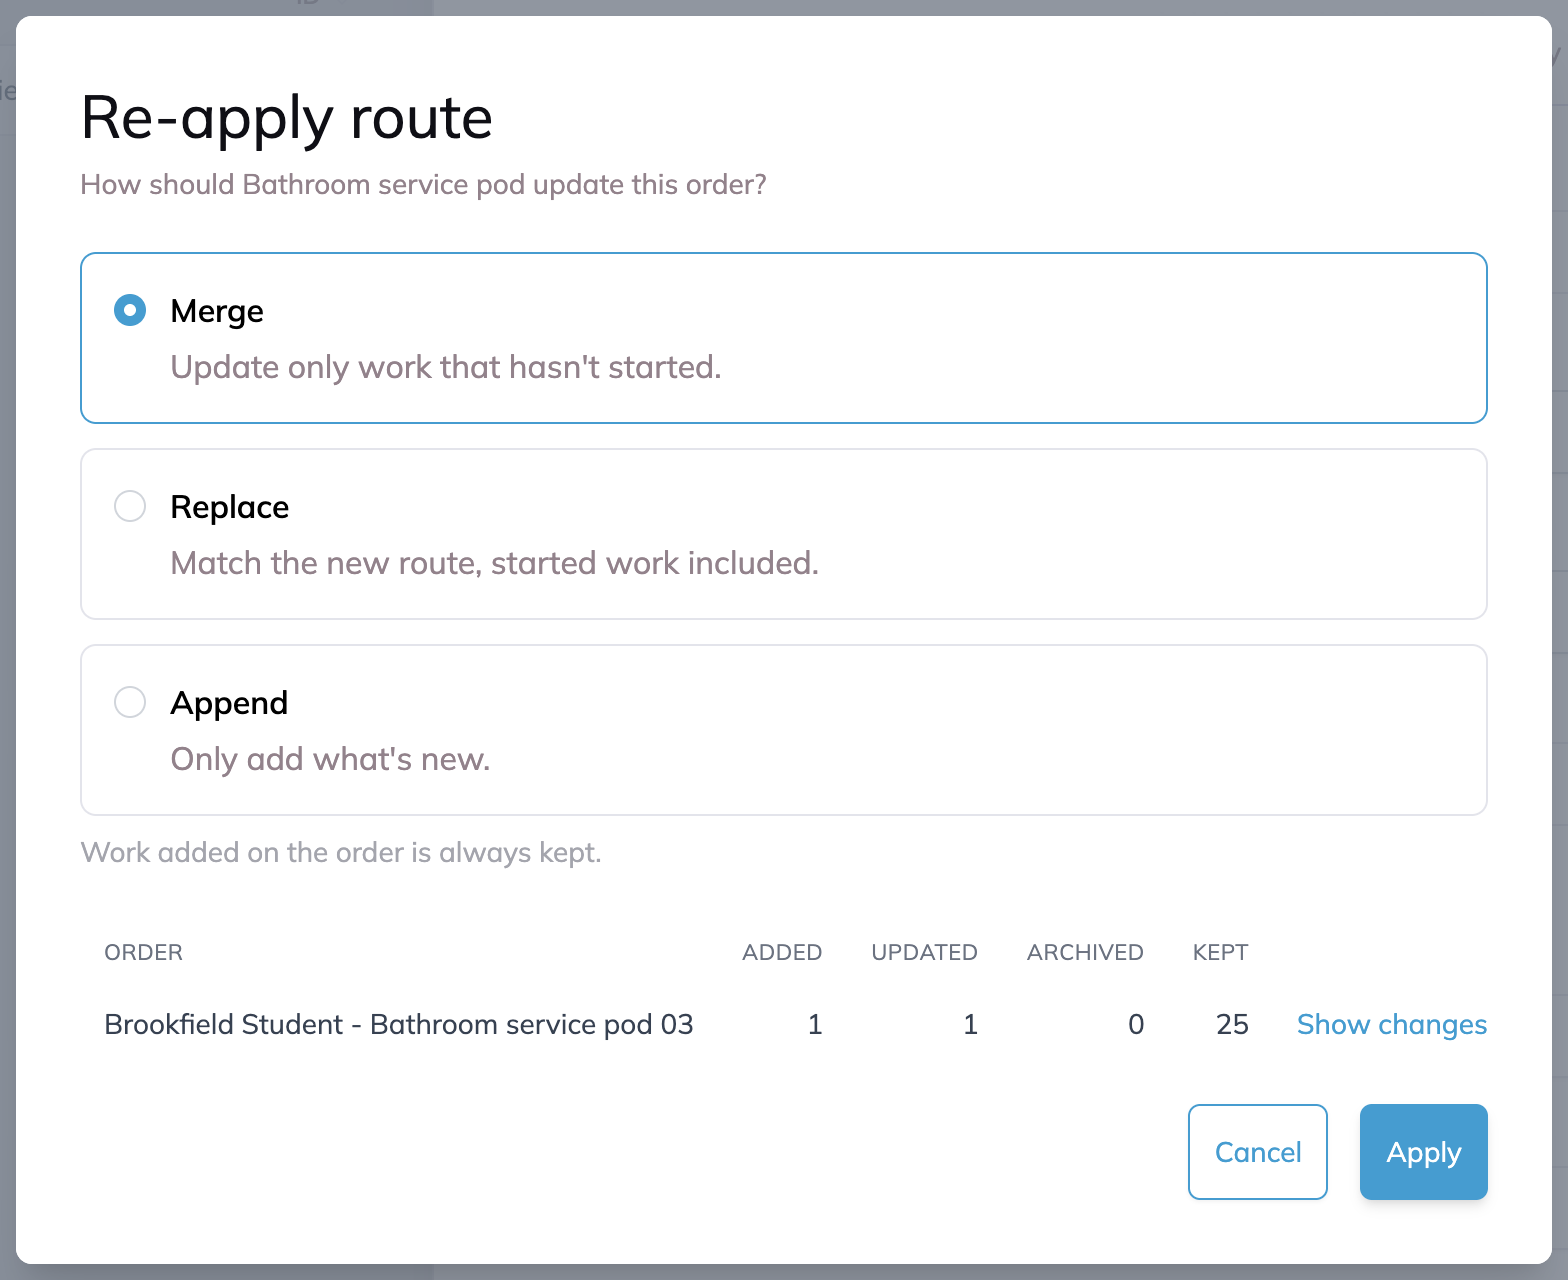
Whatever you pick, work added on the order by hand is always kept. The route only touches what it put there.
An item counts as started when it has moved past To Do or Waiting, when work has been recorded on it, or when material has been consumed for it. Allocated material alone doesn't count. If one step in a stage has started, the stage and everything above it count as started too.
Nothing is deleted. When the route no longer has an item, the order's copy is archived with its progress. If the item comes back to the route, the next apply restores it.
Step-by-Step Guide
Re-apply a Route to One Order
Use this when one order needs the latest version of its route. See Managing Orders for opening an order.
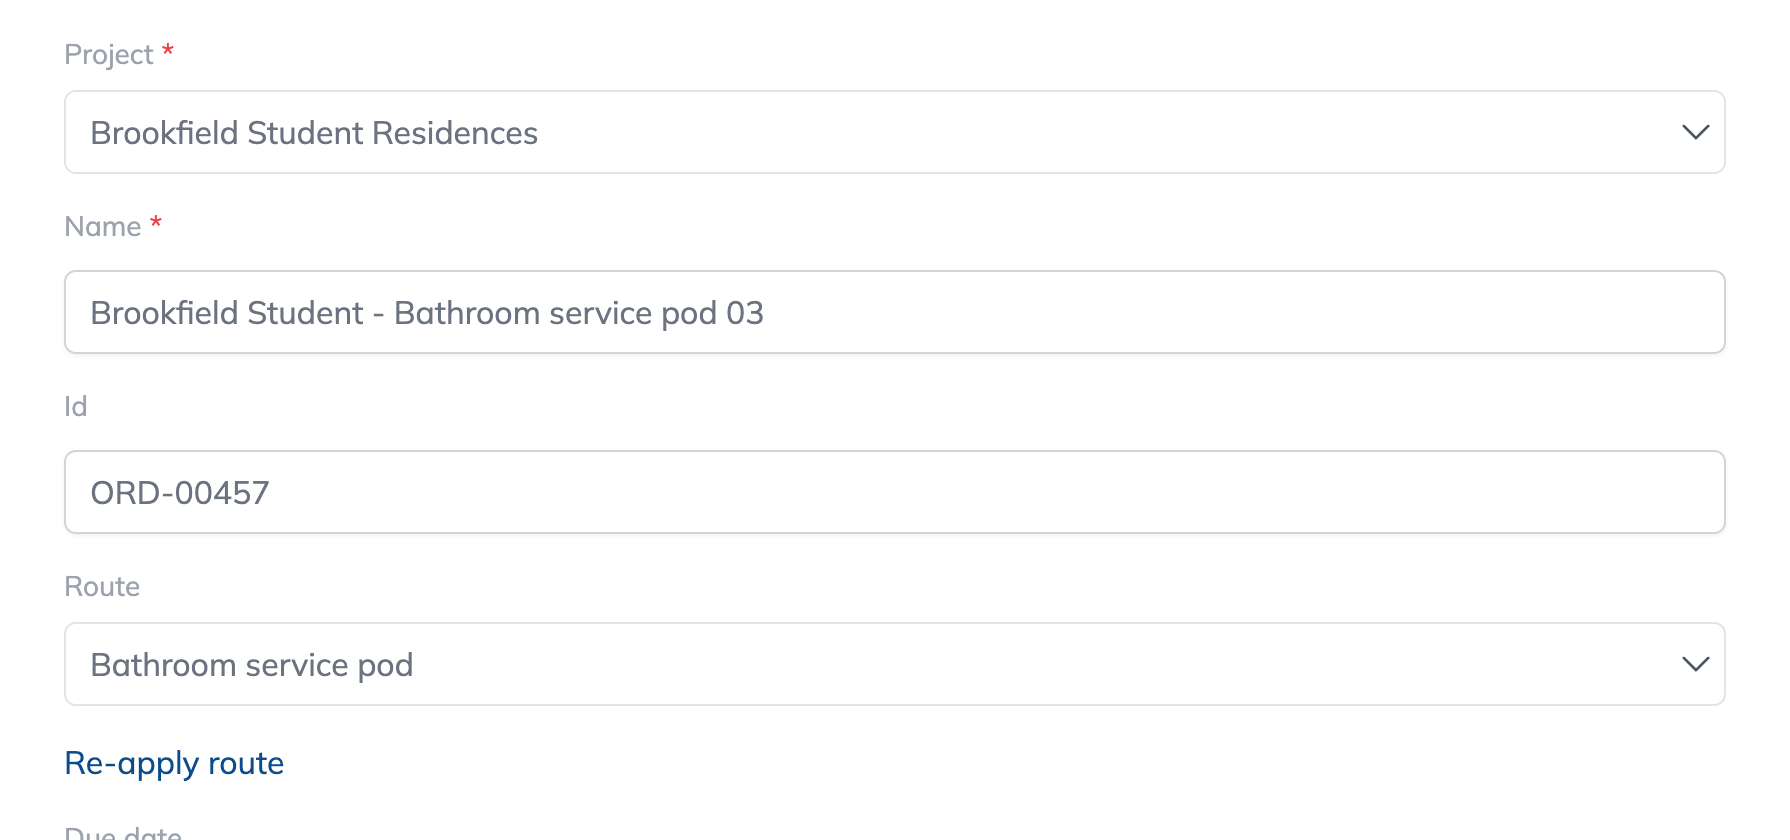
Open the order to edit it.
Under the Route field, click Re-apply route.
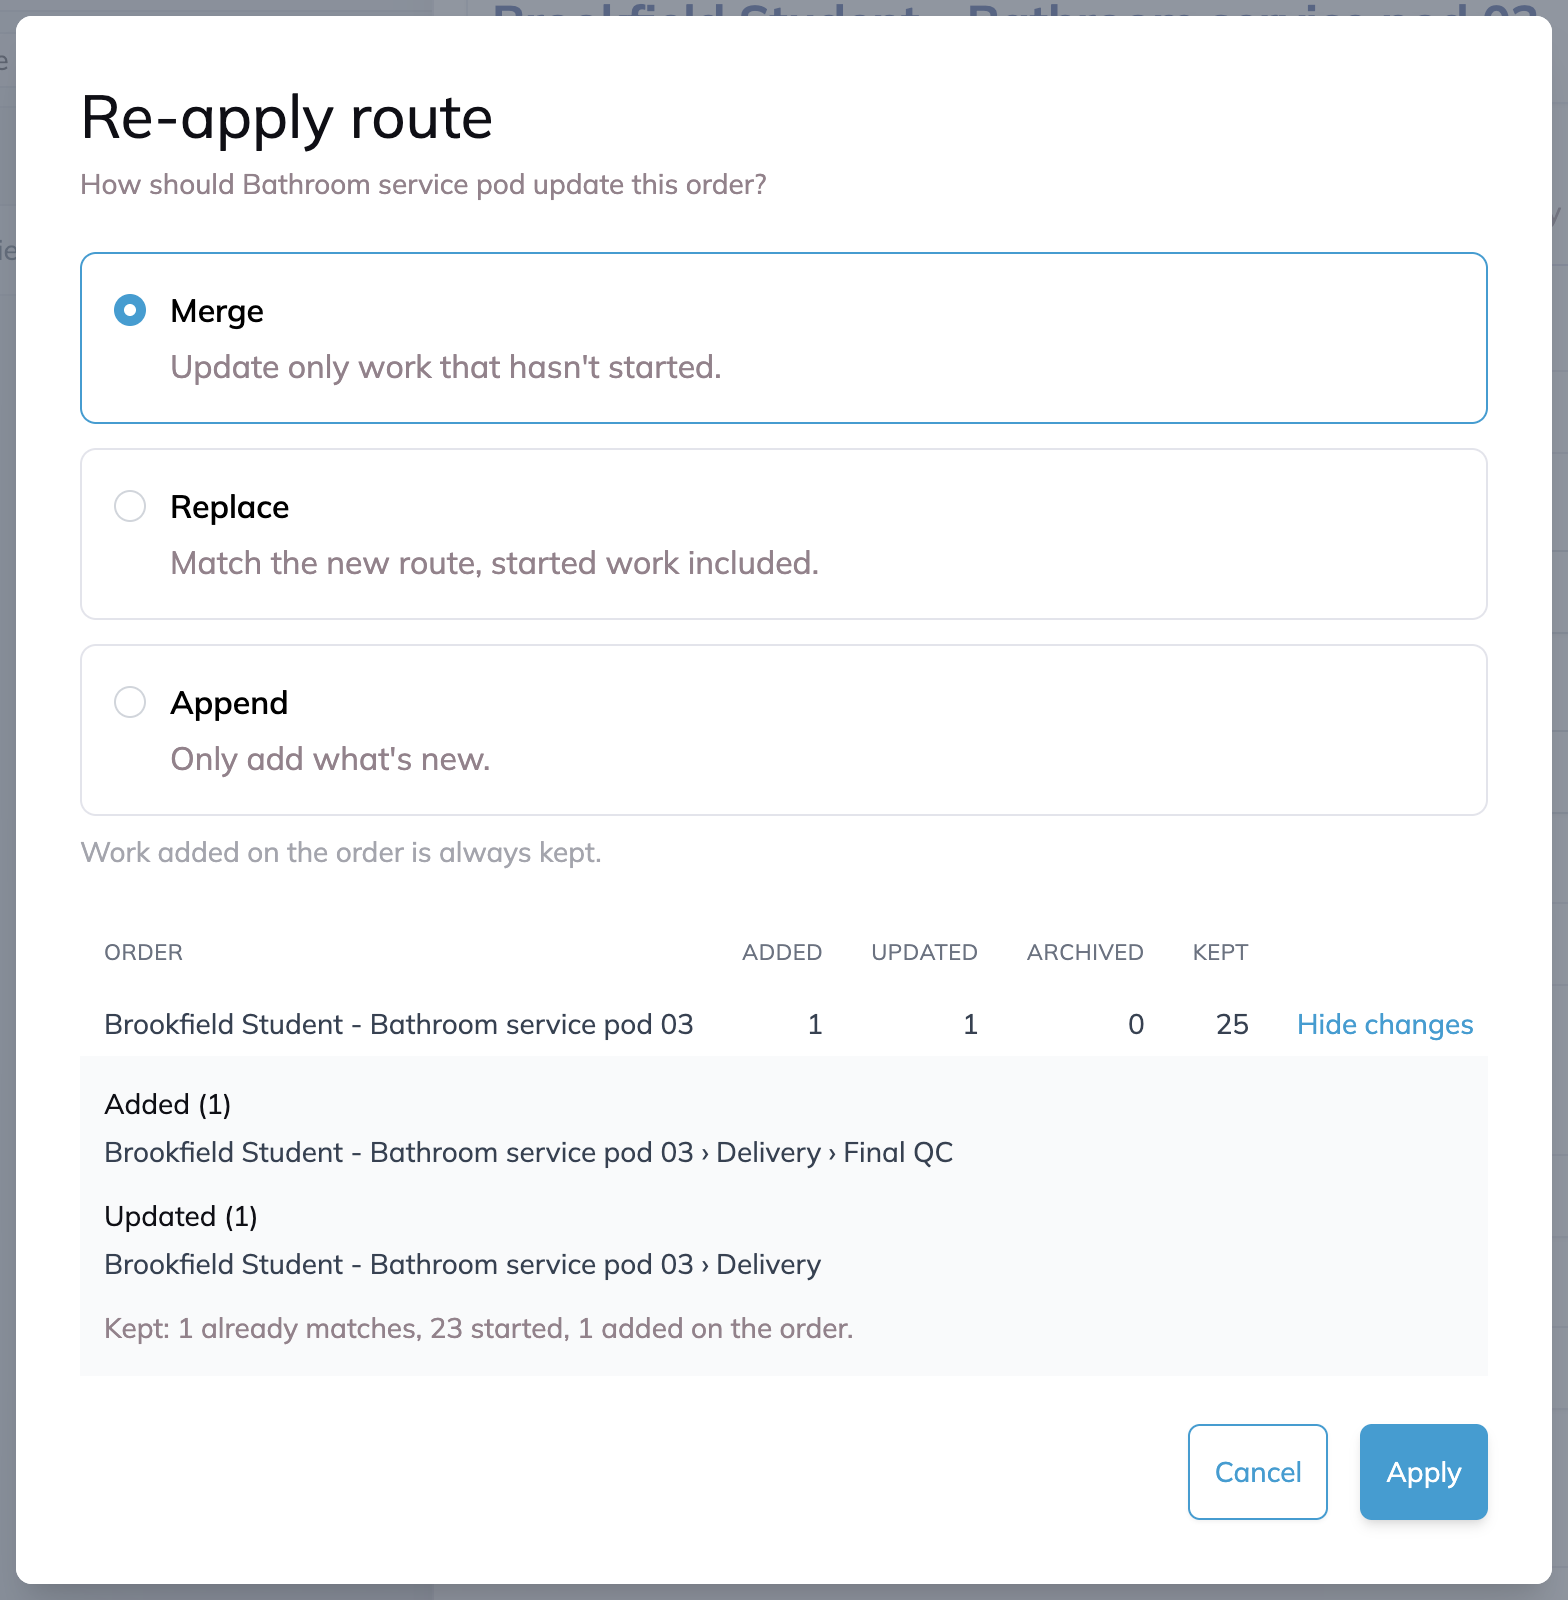
Pick Merge, Replace, or Append. Your company's default is already selected.
Read the counts: Added, Updated, Archived, and Kept. They change as you switch modes.
Click Show changes to see each item by name, and why anything was kept.
Click Apply.
The same Re-apply route link sits under the Route field on a phase or component that has its own route, so you can update one piece of an order without touching the rest.
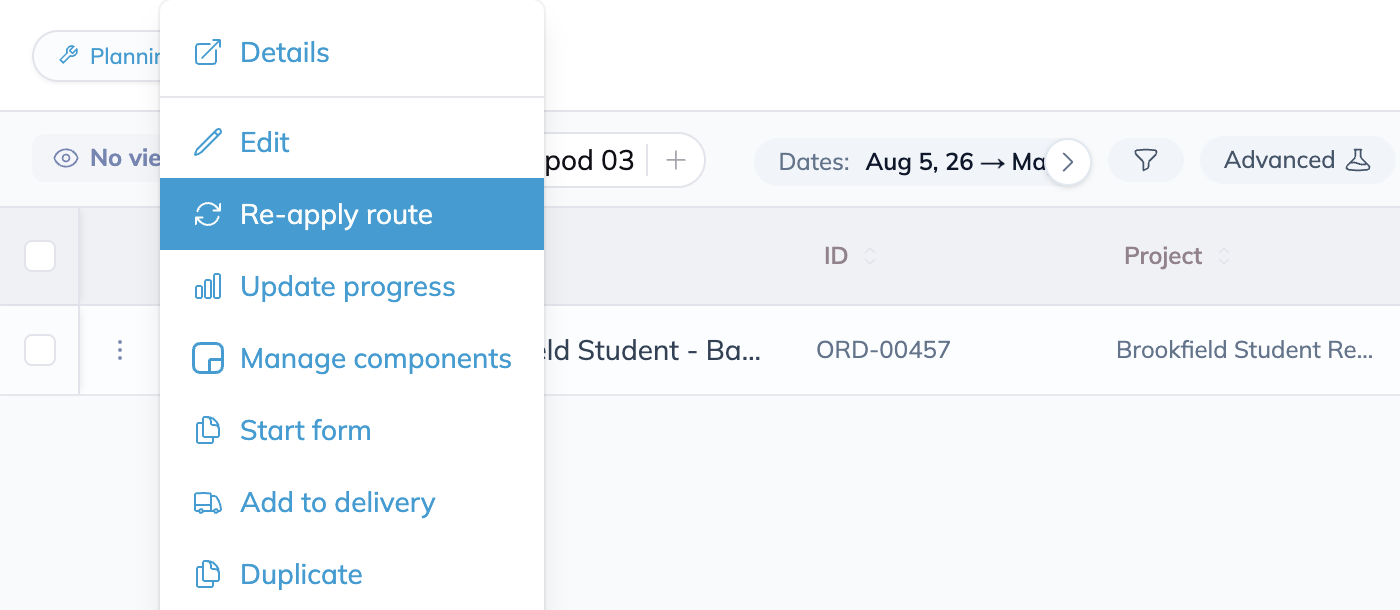
In Planning, the row menu on an order, phase, or component that has a route offers Re-apply route too, so you don't have to open it first.
Update Every Order From the Route
Use this after a route change that every order on it should get. See Managing Routes for editing the route itself.
Open the route.
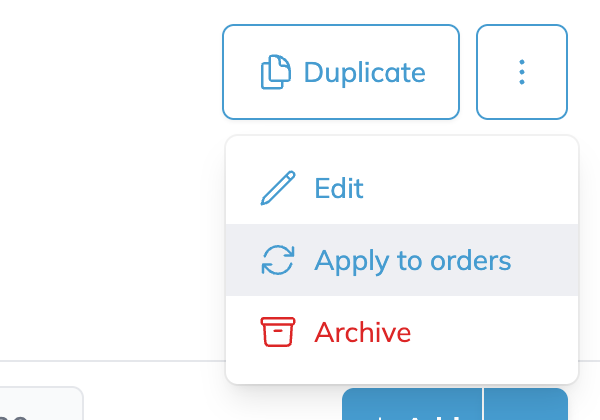
Open the menu on the route header and click Apply to orders.
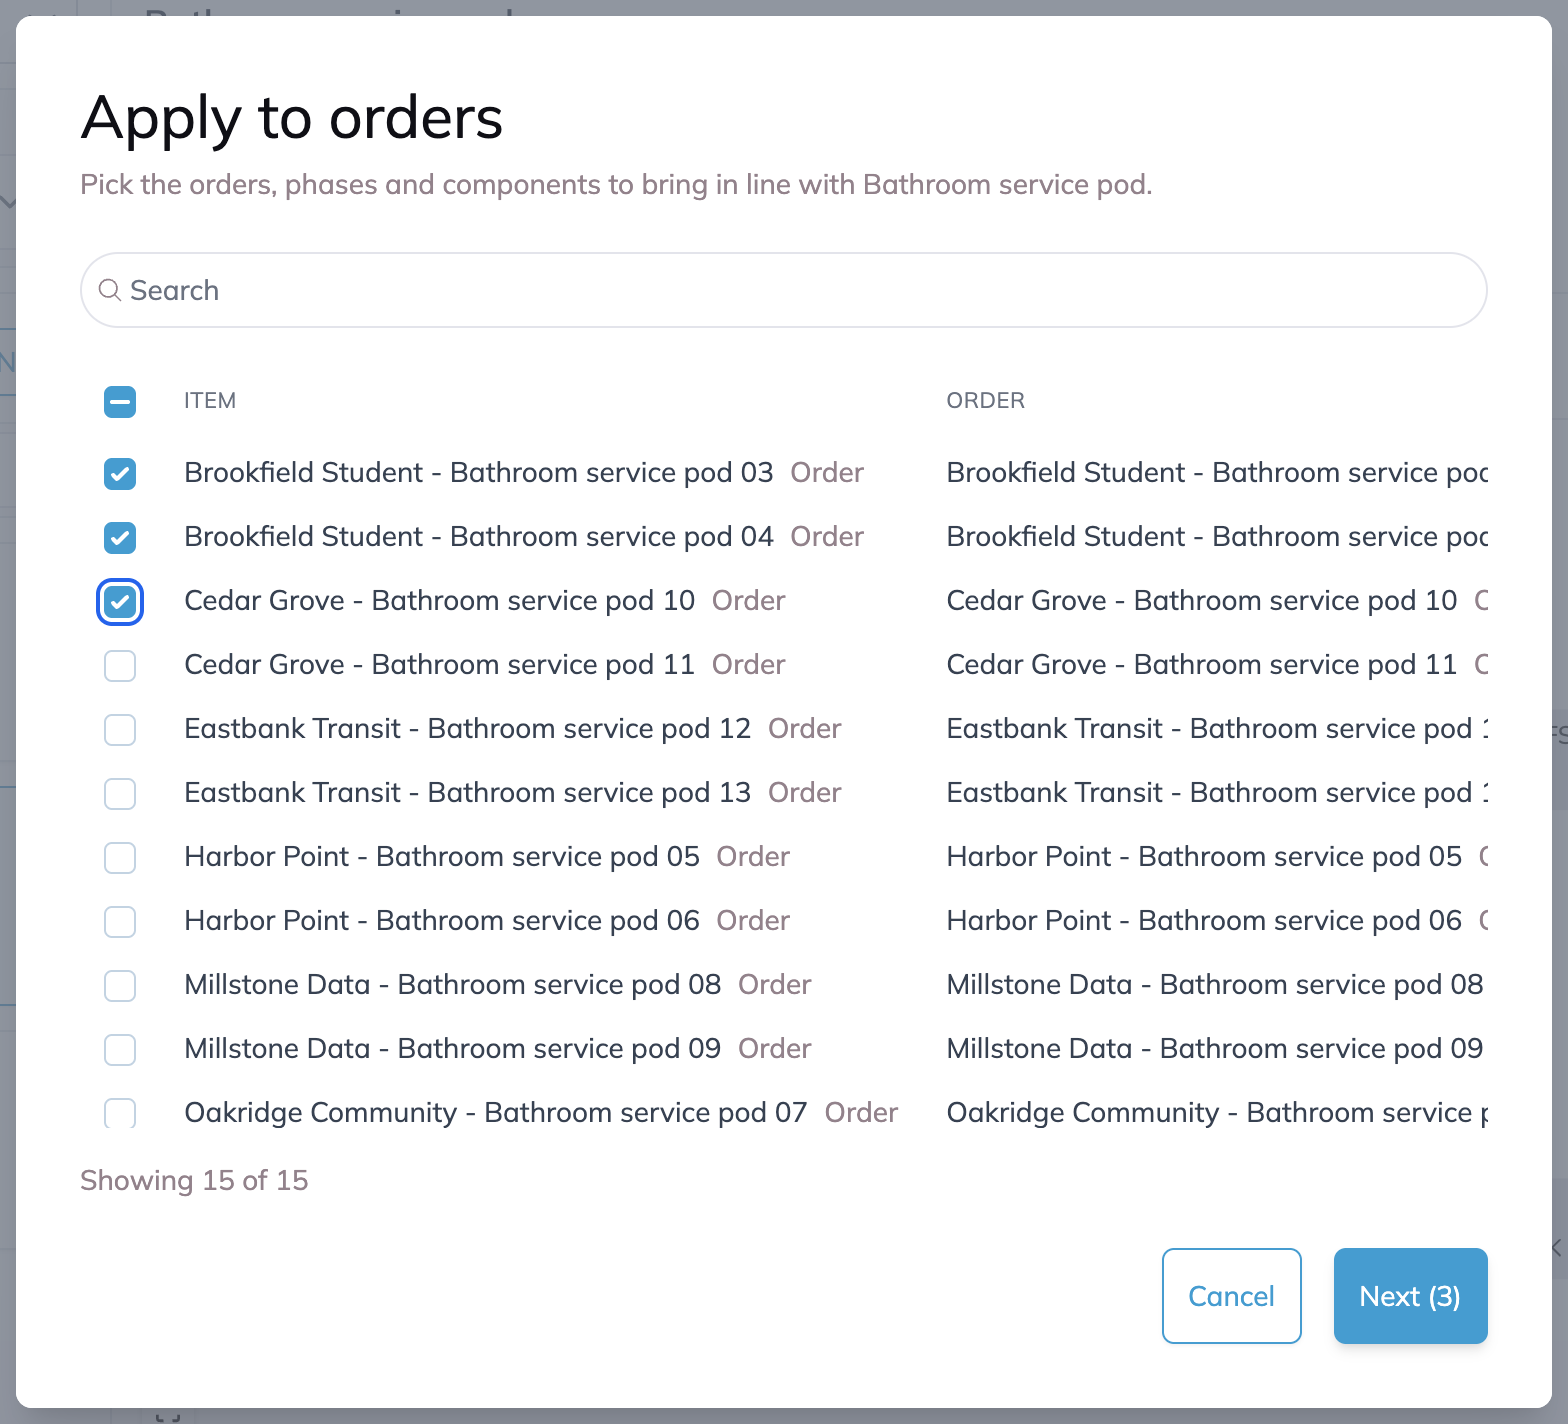
Pick what to update. The list shows every order, phase, and component that uses the route, with its order and project. Use the search to narrow it down.
Click Next.
Pick a mode and check the counts for each item. Click Show changes on any item to see the detail.
Click Apply.
The update runs in the background, so you can keep working. When it finishes, any order that couldn't be updated is listed in the System Log with the reason, and the orders that were updated keep their change.
Change the Route on an Order
When you pick a different route in the Route field of an order that already has one, Building Swell asks the same question before it saves. The dialog is titled Change route and works the same way: pick a mode, check the counts, and click Apply. Cancel and the order keeps its current route.
Bulk edit and imports ask once for the whole batch. In bulk edit, the mode picker appears when the field you change is the route. An import that changes the route on items that already have one shows each item's counts and asks for one mode before it imports. See Planning: Import & Export.
Set Your Company's Default Mode
Open Company Settings.
Under Planning, pick the Default route apply mode.
Save.
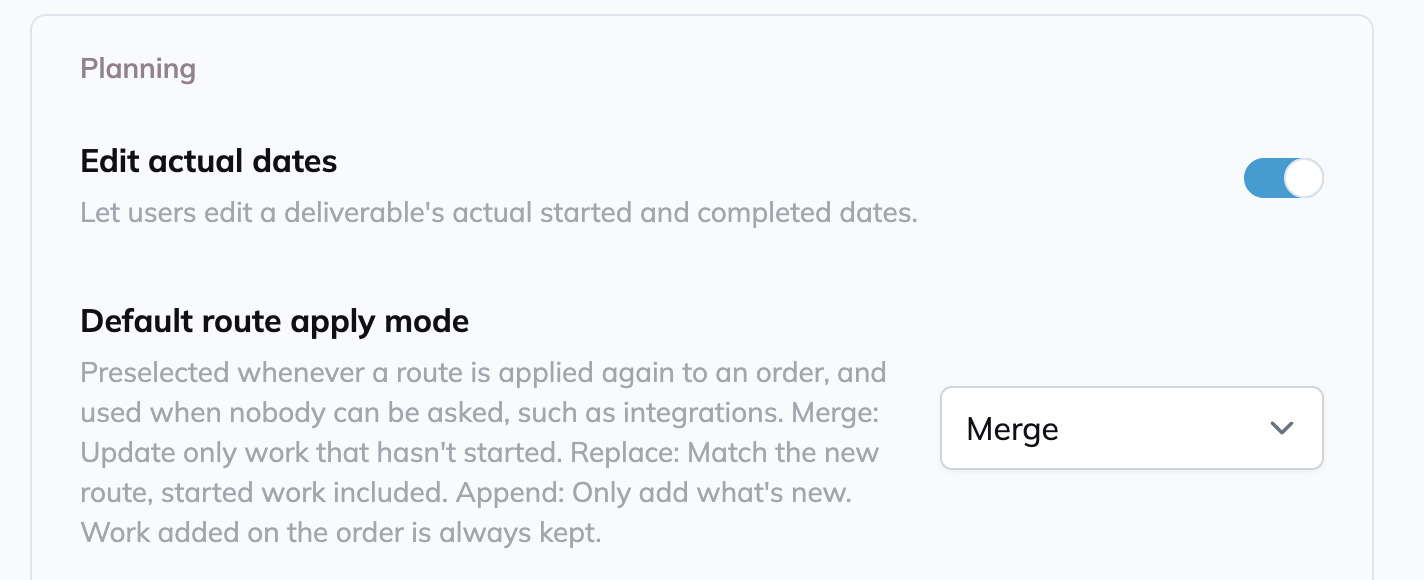
The default is preselected every time someone applies a route again. It is also the mode used when nobody can be asked, such as an integration changing a route.
Rename a Component Everywhere
Renaming a component on a route with Rename carries the new name to every order built from the route, and the orders keep their progress on it.
Open the route and double-click the component.
Click Rename under the Name field.
Type the new name. The dialog shows how many orders are built from the route.
Click Rename.
Orders you can't edit keep the old name, and the confirmation tells you how many.
Tips
Start with Show changes. It lists every item that will be added, updated, or archived before anything happens.
Use Append to add a step to work in progress. Merge leaves a started stage exactly as it is, so a new step inside it is not added. Append adds it and changes nothing else.
Make Merge your default if you're unsure. It never changes work the floor has started.
FAQ
Does saving a route change my orders?
No. Saving changes the route only. Orders change when you re-apply the route or use Apply to orders.
Will I lose progress?
No. No mode erases logged progress. Merge and Append leave started work as it is, and Replace keeps its progress while matching it to the route.
Is anything deleted?
No. Items the route no longer has are archived with their progress, and the next apply restores them if the route gets them back. See Archiving and Restoring.
Does it change quantities?
No. Quantities follow the order, not the route.
What about a component with its own route?
It stays with its own route. Applying the parent route leaves it alone, and the dialog counts it as kept.
Conclusion
Change the route, then decide how far the change goes: Merge for work that hasn't started, Replace to match the route fully, Append to only add. Use Re-apply route for one order and Apply to orders for all of them.
Need help? Hit the chat button or click "Ask" in the app. You can also reach us at support@buildingswell.com.
Was this helpful?
Still need help? Ask the team