
Tracking Time
Introduction
Accurate time tracking keeps labor dashboards, project costs, and capacity forecasts on point. Building Swell offers several ways to log hours, but the three workflows below cover scenarios on the shop floor or in the office. Choose the one that fits your moment, and remember that shops using QR badges and traveler sheets can layer scan-based tracking on top of any method for even faster data capture.
Prerequisites
- Shop, projects, orders, routes, stages, and steps are set up in Building Swell.
- Shop team members have active user accounts (or QR badges, if scanning).
Step-by-Step Guide
While Building Swell collects hours from multiple sources, this guide zeros in on the three fastest, field tested workflows customers use most. For each, we'll highlight when it's best suited for use with a step-by-step walkthrough for your team.
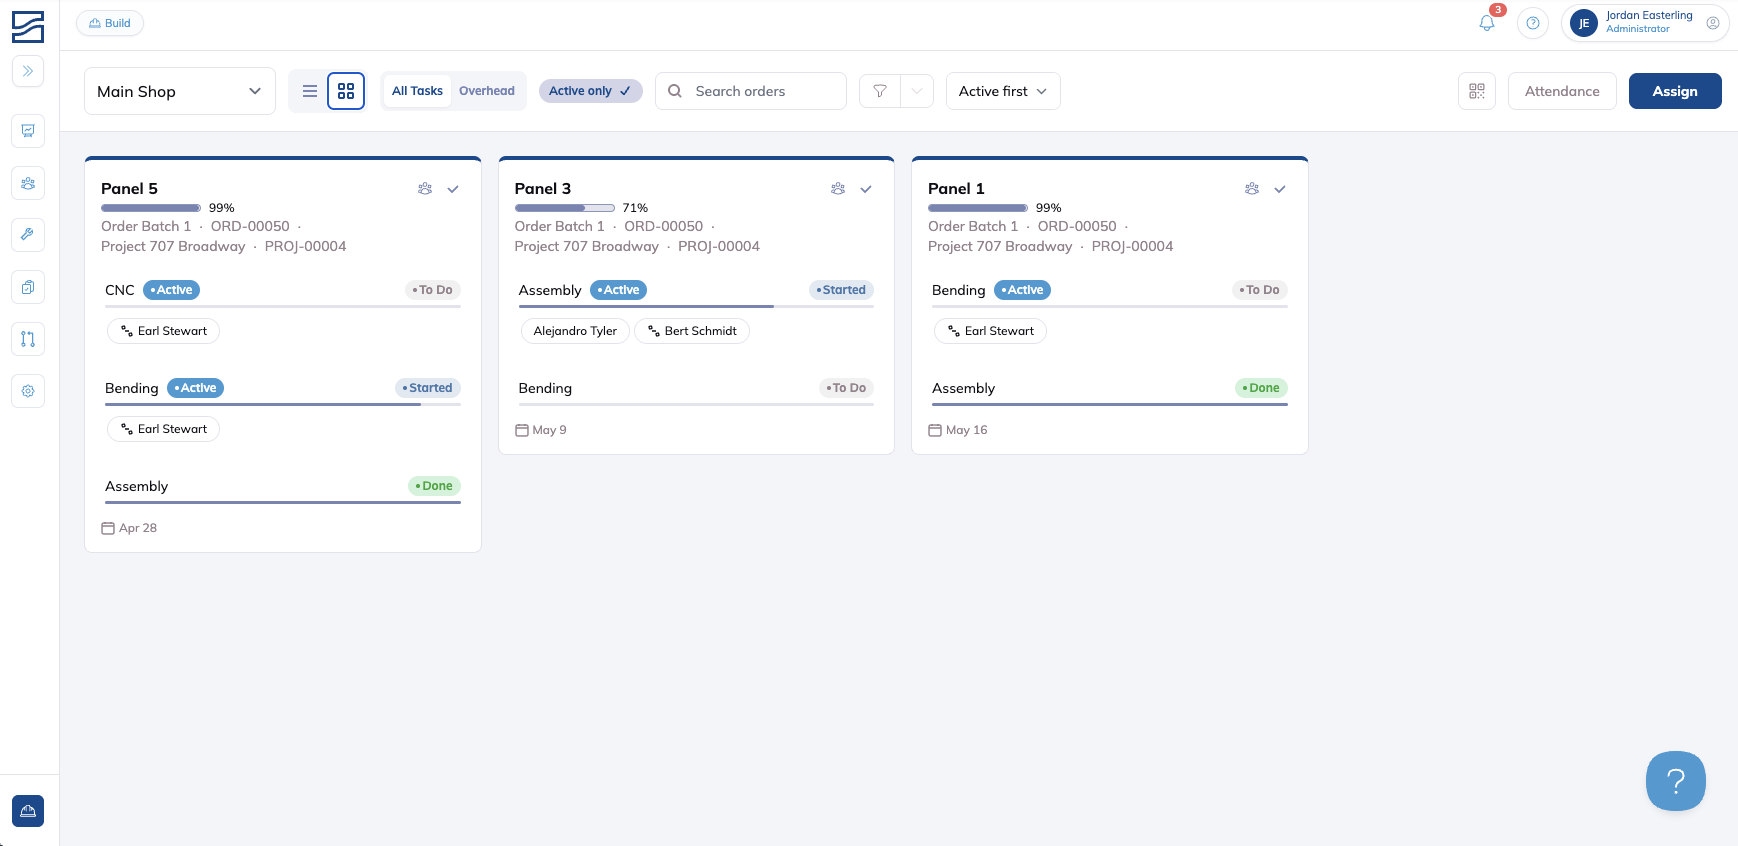
Build
Build turns any shop-floor iPad into a tap-and-go kiosk. The shop team member clocks in once, taps the task they’re starting, and the system times every minute until they choose a new task.
Best for: live, self-service time capture for shop team members who move between tasks.
- Clock in for the day (reference the Attendance Guide for more information).
-
Head to Build
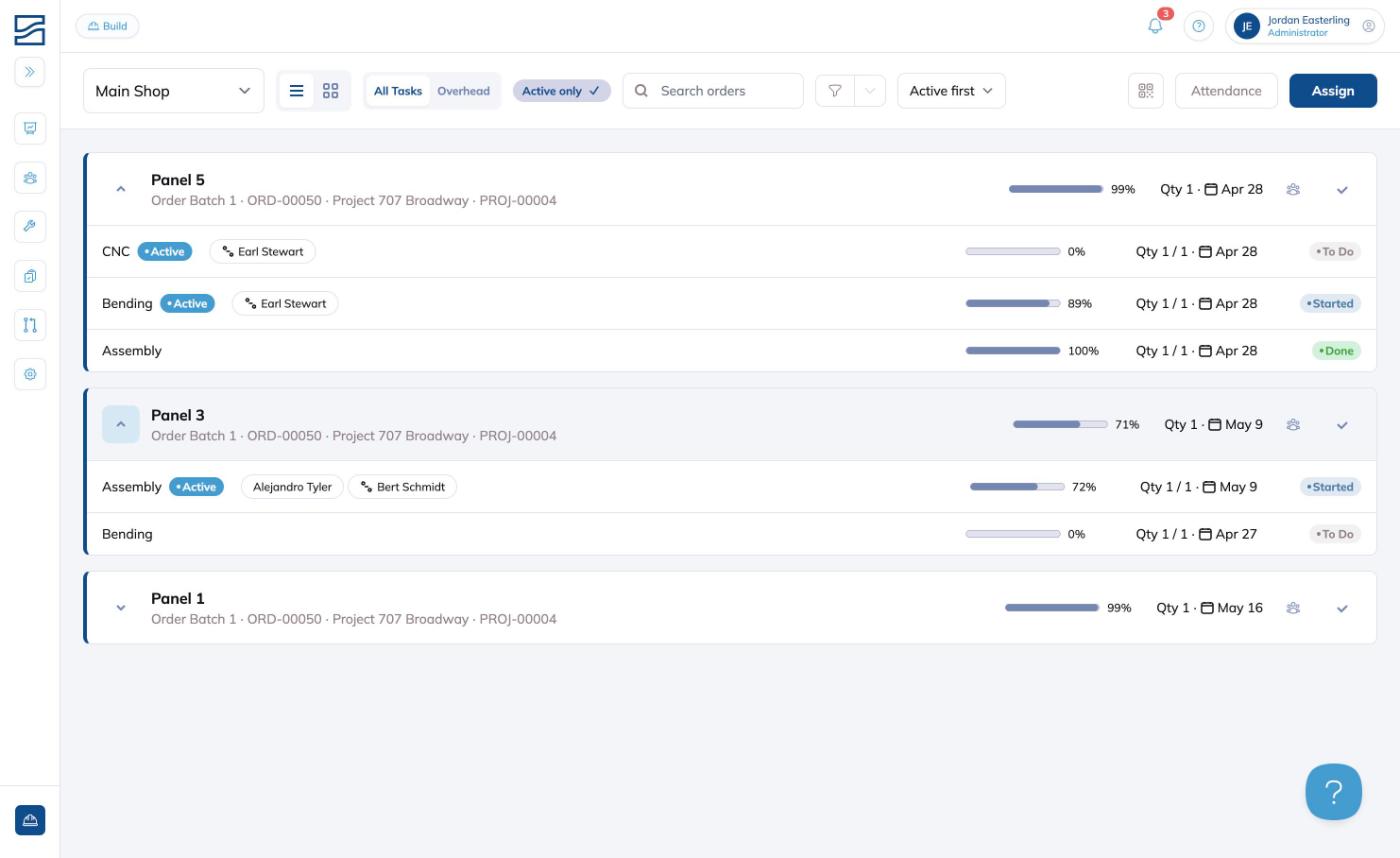
- Select your work by choosing the Project / Order you’ll start on so subsequent tasks map to the right job.
-
Or start tracking directly by tapping Manage, then
- Pick the Build / Job at the top
- Select the Stage or Overhead task
- Assign who is working from the list of people
- Click Save. A live timer begins.
- Switch tasks on the fly. When you move, repeat Manage → Task → Save. Building Swell stitches each segment into a single daily record.
- Clock out at shift end by heading to Hardhat mode → Attendance → tap your name again.


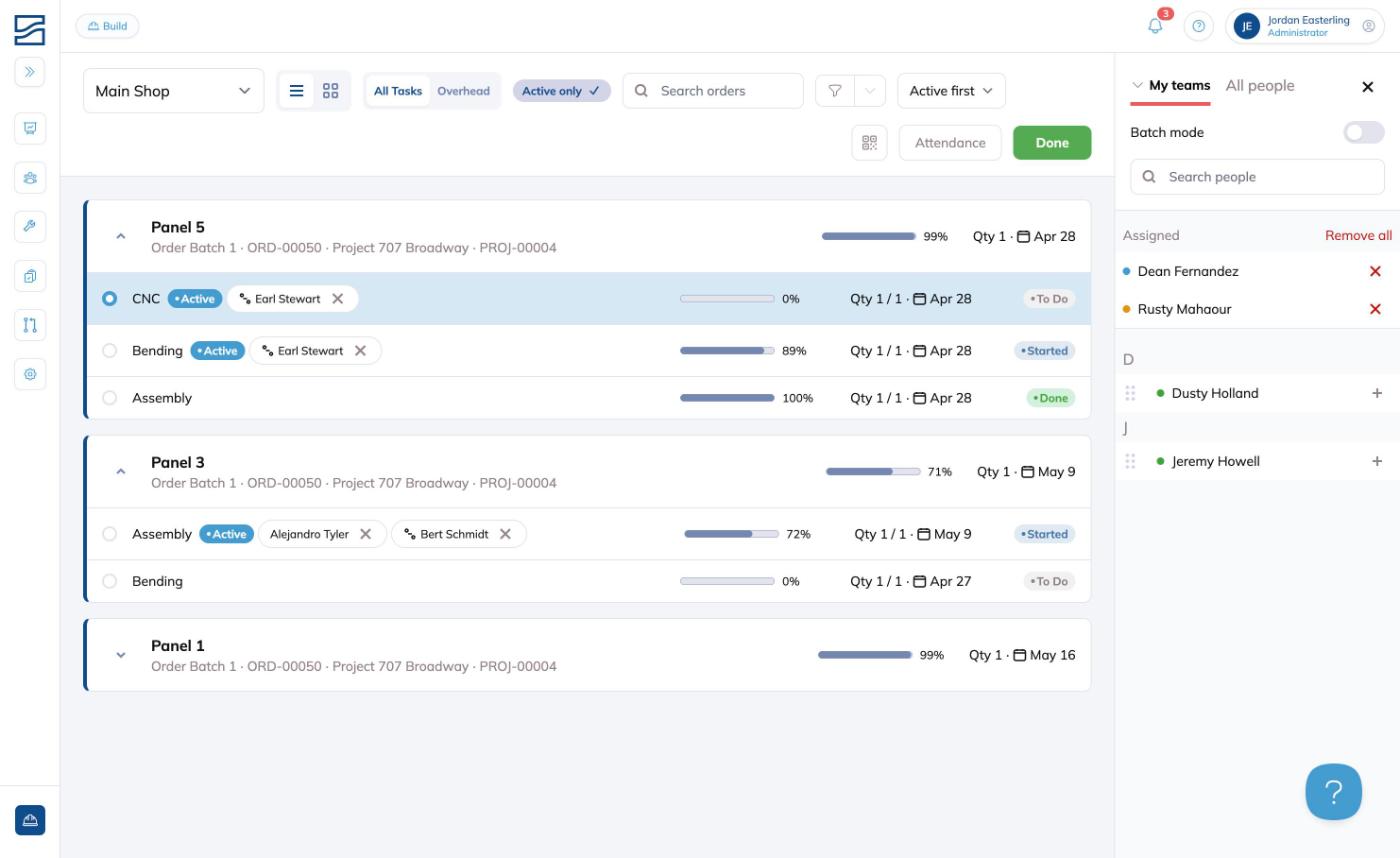
Digital Whiteboard
Daily Planner is a drag-and-drop board that shows every build in flight and everyone on the clock. A supervisor can re-allocate multiple people in seconds and keep production balanced.
Best for: fast, bulk reassignment for crew leads balancing headcount in real time.
-
Head to Build
- Select the Grid View.
-
Assign or move a shop team member: drag a Person tile onto a Task, or select from the dropdown in the row.

Timesheets
The Timesheets page is your editable ledger of every project cost and daily record. Use it when someone forgot to clock in, when exporting to payroll, or when back-dating historical hours.
The page lives under Insights → Timesheets and offers two views—Check in/out and Sessions—toggled with the Type dropdown at the top left. For more information, check out our guide for Timesheets.
Best for: back-office corrections, detailed split entries when shifts are finished, and payroll exports.
Getting Started
- Navigate to Insights → Timesheets.
- Select your Department tab at the top of the page (e.g., Atlanta Shop, BIM/VDC, Main Shop, Material). You can also use the Select Dept option to add additional departments. Choose the tab that matches your team.
- Use the Type dropdown to choose your view:
Check in/out View
This is a weekly calendar grid showing each person as a row and each day of the week as a column. Hours appear in each cell, with a Total column on the right. Use the date arrows or This week button to navigate between weeks.

- Click a person's cell for the day you need to edit. A detail panel slides open on the right showing the person's name, date, and their Check in hours.
- Edit the Check in time, or click + Add new entry to log an additional check-in/check-out pair for that day.
- Review the Sessions section in the same panel. Each session shows the task name, ID, stage, and duration. Click See details to expand a session, or click + Add Work Session to create a new one.
- Optionally assign a Cost Code using the search dropdown at the bottom of the panel.
- If the entry has an error (e.g., more session hours than shift hours), the hours will appear in red. Click Approve all errors at the top of the panel to acknowledge them.
- Click Save to apply your changes.

Sessions View
This is a flat table listing every individual work session for the selected week. Columns include Name, Task name, Task ID, Task type, Date, Start time, End time, and Hours. Entries marked in red have errors.

- To add a new session, click the + Add button in the top right.
- In the New Session panel, select a Person, then choose the Session Type:
- Order Session — for production work. Select the Build Order and Stage from the hierarchy dropdown.
- Overhead Session — for non-billable shop work (cleaning, admin, etc.).
- Enter the Date, Start time / End time (or just a Duration), and optionally a Cost Code.
- Click Save.
- To edit an existing session, click its row. The detail panel opens with all fields editable—update times, reassign the Build Order or Stage, and Save.

Filtering, Searching & Exporting
| Feature | Description |
| Search people | Type a name in the search bar to quickly find a person. |
| Filters | Click the Filters button to open filter options. In Check in/out view, filter by Team or toggle Show errors only. In Sessions view, the Filters panel offers Status, Dates, Stage, Shop Team, Task, and Project filters. Sessions view also has a standalone Show errors only checkbox above the table. |
| Export | Click the three-dot menu (⋮) to download the current view as a .csv or .xlsx file for payroll or record-keeping. |
Tips
- Clock in first. Attendance makes it easier to see who's in the shop today and available to work on different orders.
- Timesheets are your safety net. Perfect for missed scans or breaking a long shift into detailed sessions.
- QR-code shortcut. Scan an employee QR badge to clock in/out, then scan the order-traveler QR to start or switch tasks. Building Swell logs everything automatically. For setup, see the QR Guide.
Whether you’re tapping a QR code, balancing a crew, or tidying up records after the horn blows, these three workflows keep hours precise and real-time in Building Swell—so labor metrics stay trustworthy and schedules stay on track.
Have additional questions? Contact Us